Favorite Face of 2014

Yes, I do realize it’s 2015 now. But it’s also a great time to reflect on last year’s favorites before diving in and finding the favorites of the new year.

Instead of a straight forward list for this favorites post, I’m going to do a full makeup look and walk you through my favorite products and how I use them: just to do something a little different.

All my favorites on my face.

All my favorites on my face.

So here is the completed look. In 2014, I gravitated more towards warm tones on my eyes and nude or pink shades on my lips. Keep reading to see which products I used where.

IMG_3371

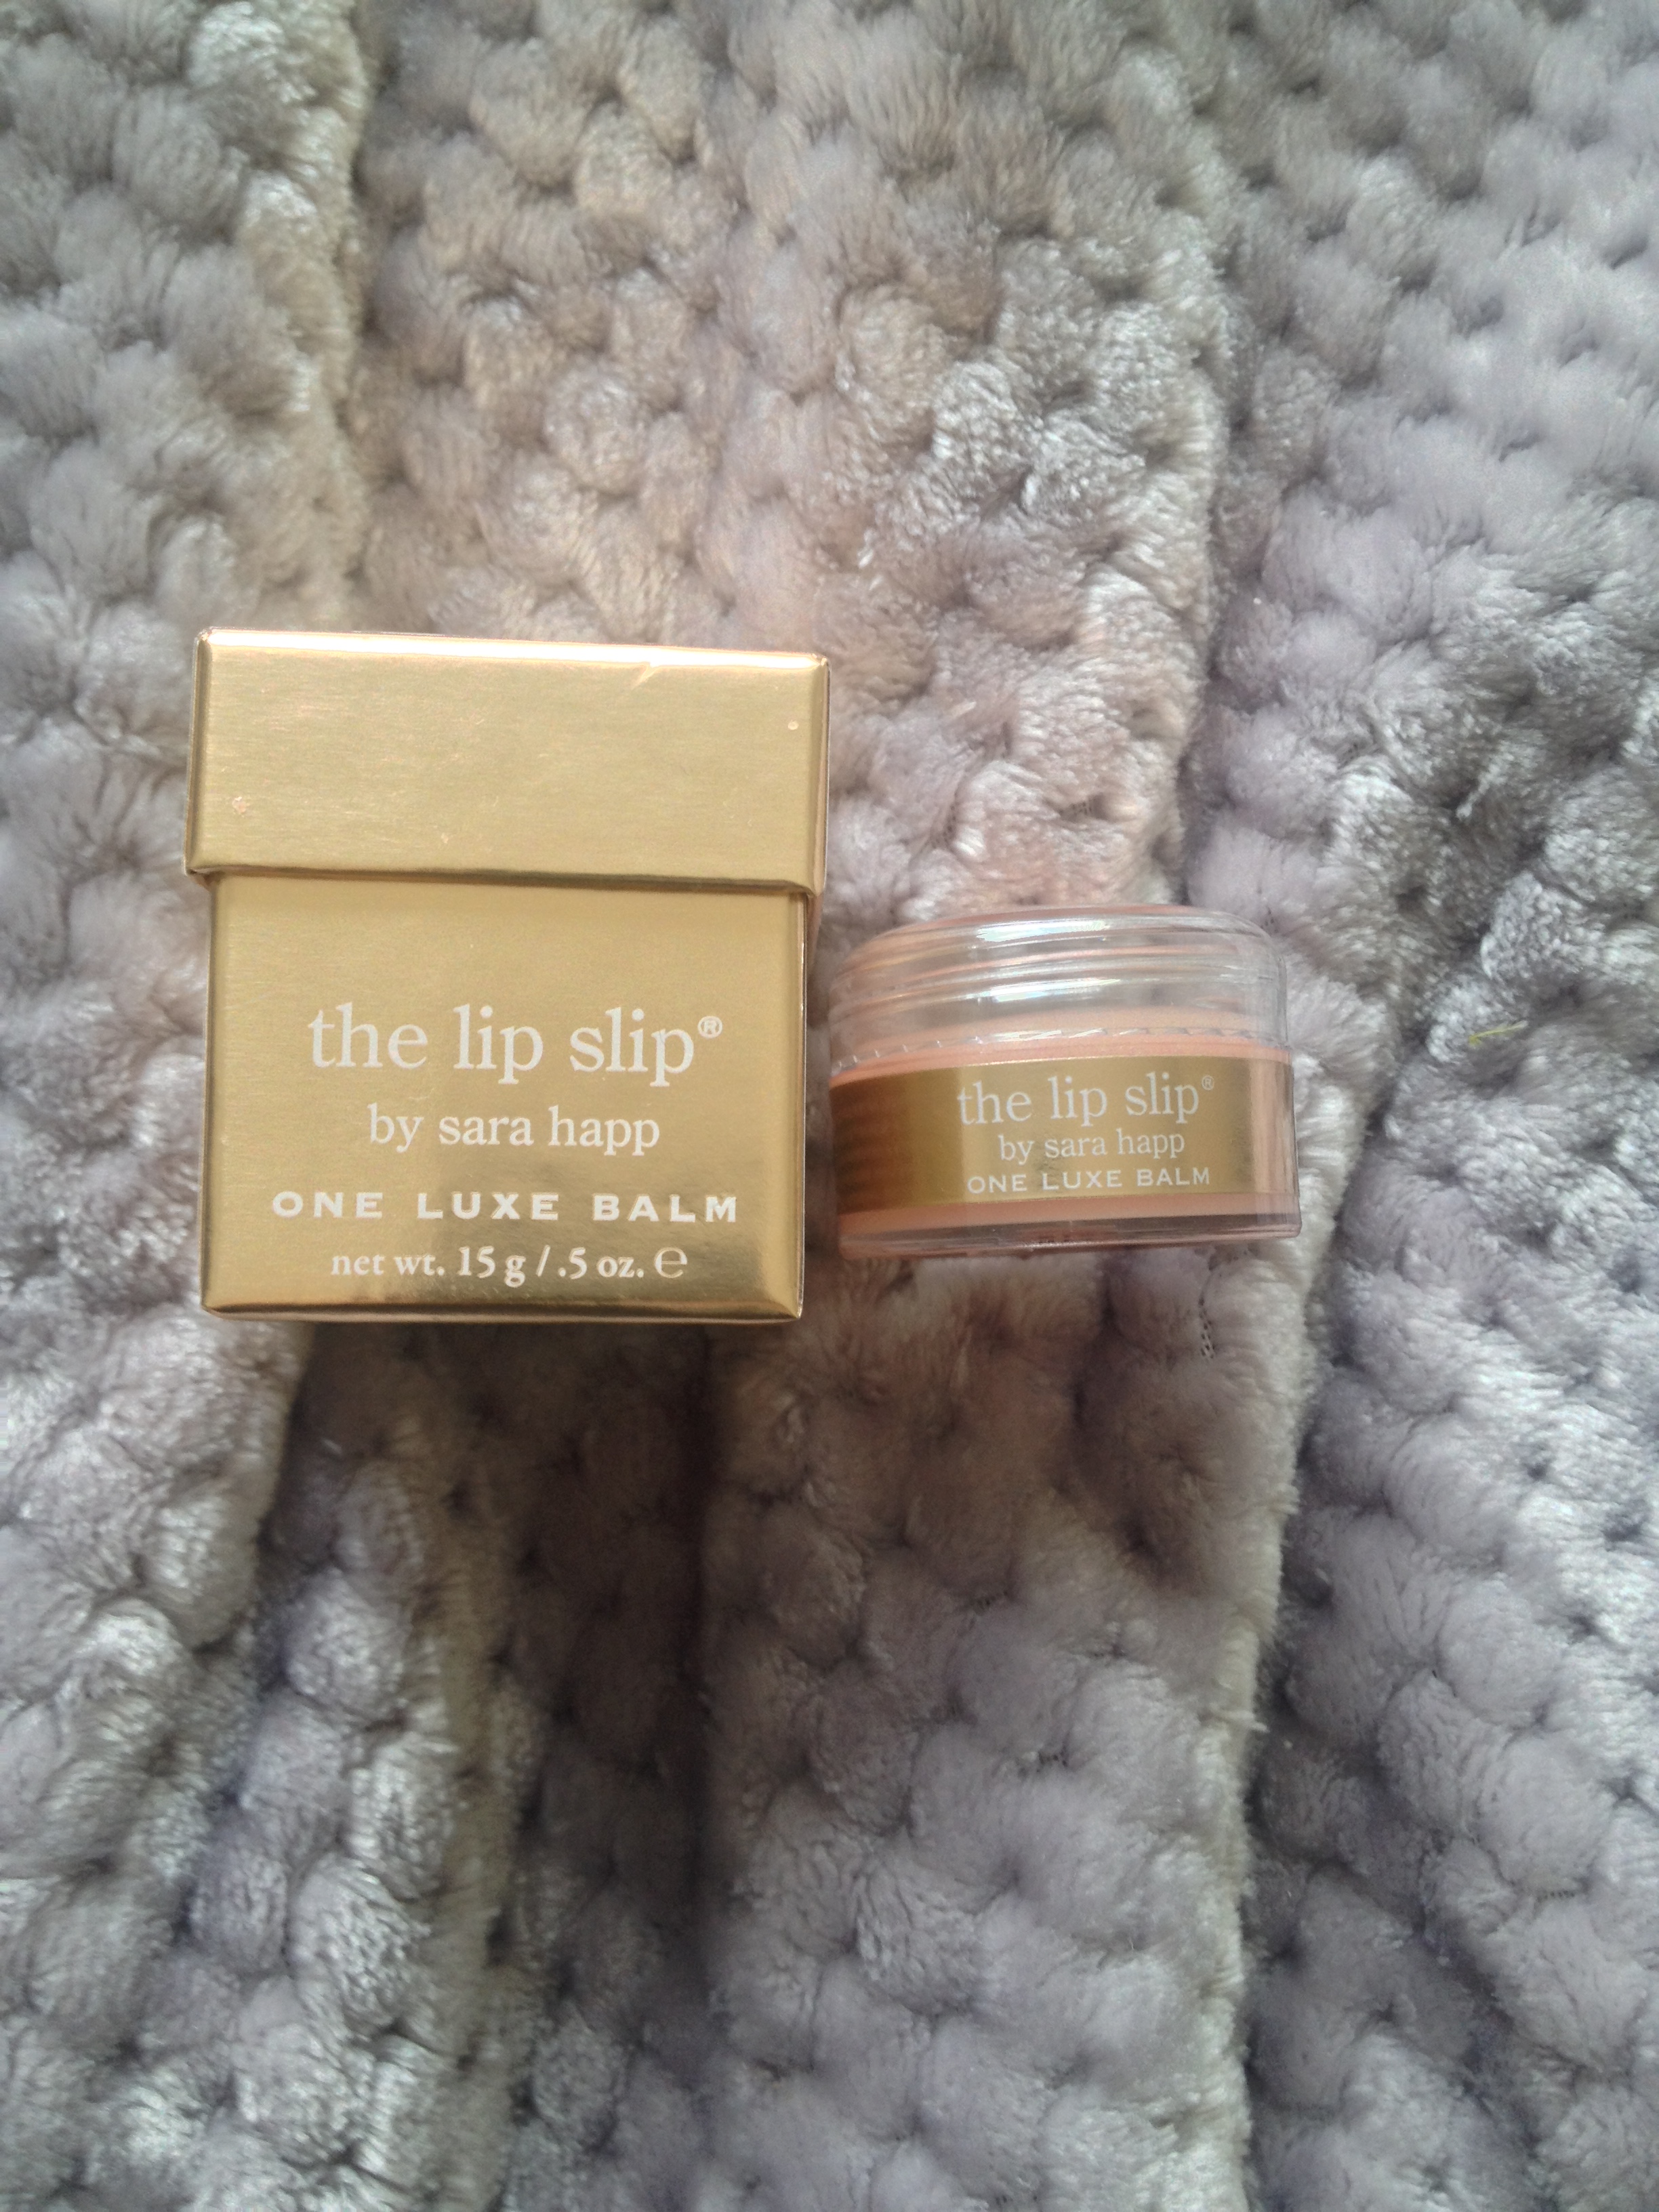
The first thing I do when applying makeup is slather on my Mongongo Lip Conditioner by Jersey Shore Suns. This lip balm claims to be anti-aging and while I can’t confirm or deny its anti-aging powers, I will say that it keeps my lips super hydrated. I like to put this lip balm on first so it has time to soak into my lips.

After that I apply primer. I started using primer regularly in 2014, and while there have been several good ones my favorite is L’Oreal’s Revitalift Miracle Blur Instant Skin Smoother. It has a lush, thick texture that my skin just soaks up. The Miracle Blur minimizes and, well, blurs my pores. I also love that it has SPF 30–living in California sunscreen is a must all year round.

I also apply a small dot of Smashbox’s Photo Finish Hydrating Under Eye Primer under both of my eyes. Typically, I don’t put much makeup under my eyes except for some concealer, so I’m really using this to keep the delicate skin under my eyes hydrated.

Choosing a favorite foundation for 2014 was hard. But when I want my skin to look natural and fresh I turn to Dr. Jart + Black Label Detox BB Beauty Balm. Again, it’s a product with SPF 25, so my skin is doubly protected. This BB cream hides skin imperfections and evens out skin tone in a way that makes you look naturally flawless. It’s a medium coverage product and I find that it lasts all day. It doesn’t crease or cake up on me either. You really don’t need much to cover your whole face so this tiny tube has lasted me a while.

IMG_3373

After foundation, I apply a bit of concealer and my favorite is the Maybelline Instant Age Rewind Eraser for Dark Circles. I believe I use the shade Fair. Essentially everyone who talks about beauty products loves this concealer, so I won’t claim to be reinventing the wheel here by listing it as a favorite. I dab it under my eyes and on any blemishes I may have at the moment. Sometimes I also dab it down the center of my nose to tone down my freckles. I would recommend removing the sponge tip that this concealer comes with–even though it’s super soft, I feel I get better application with my clean fingertips and waste less product.

I don’t set my face with powder everyday, but if I know I’ll be out long or have a special event, I reach for NYX’s HD Studio Photogenic Finishing Powder. It’s a white powder that does a great job at setting whatever foundation or concealer you choose. For this look, I gently patted this finishing powder under my eyes to set the Instant Age Rewind concealer.

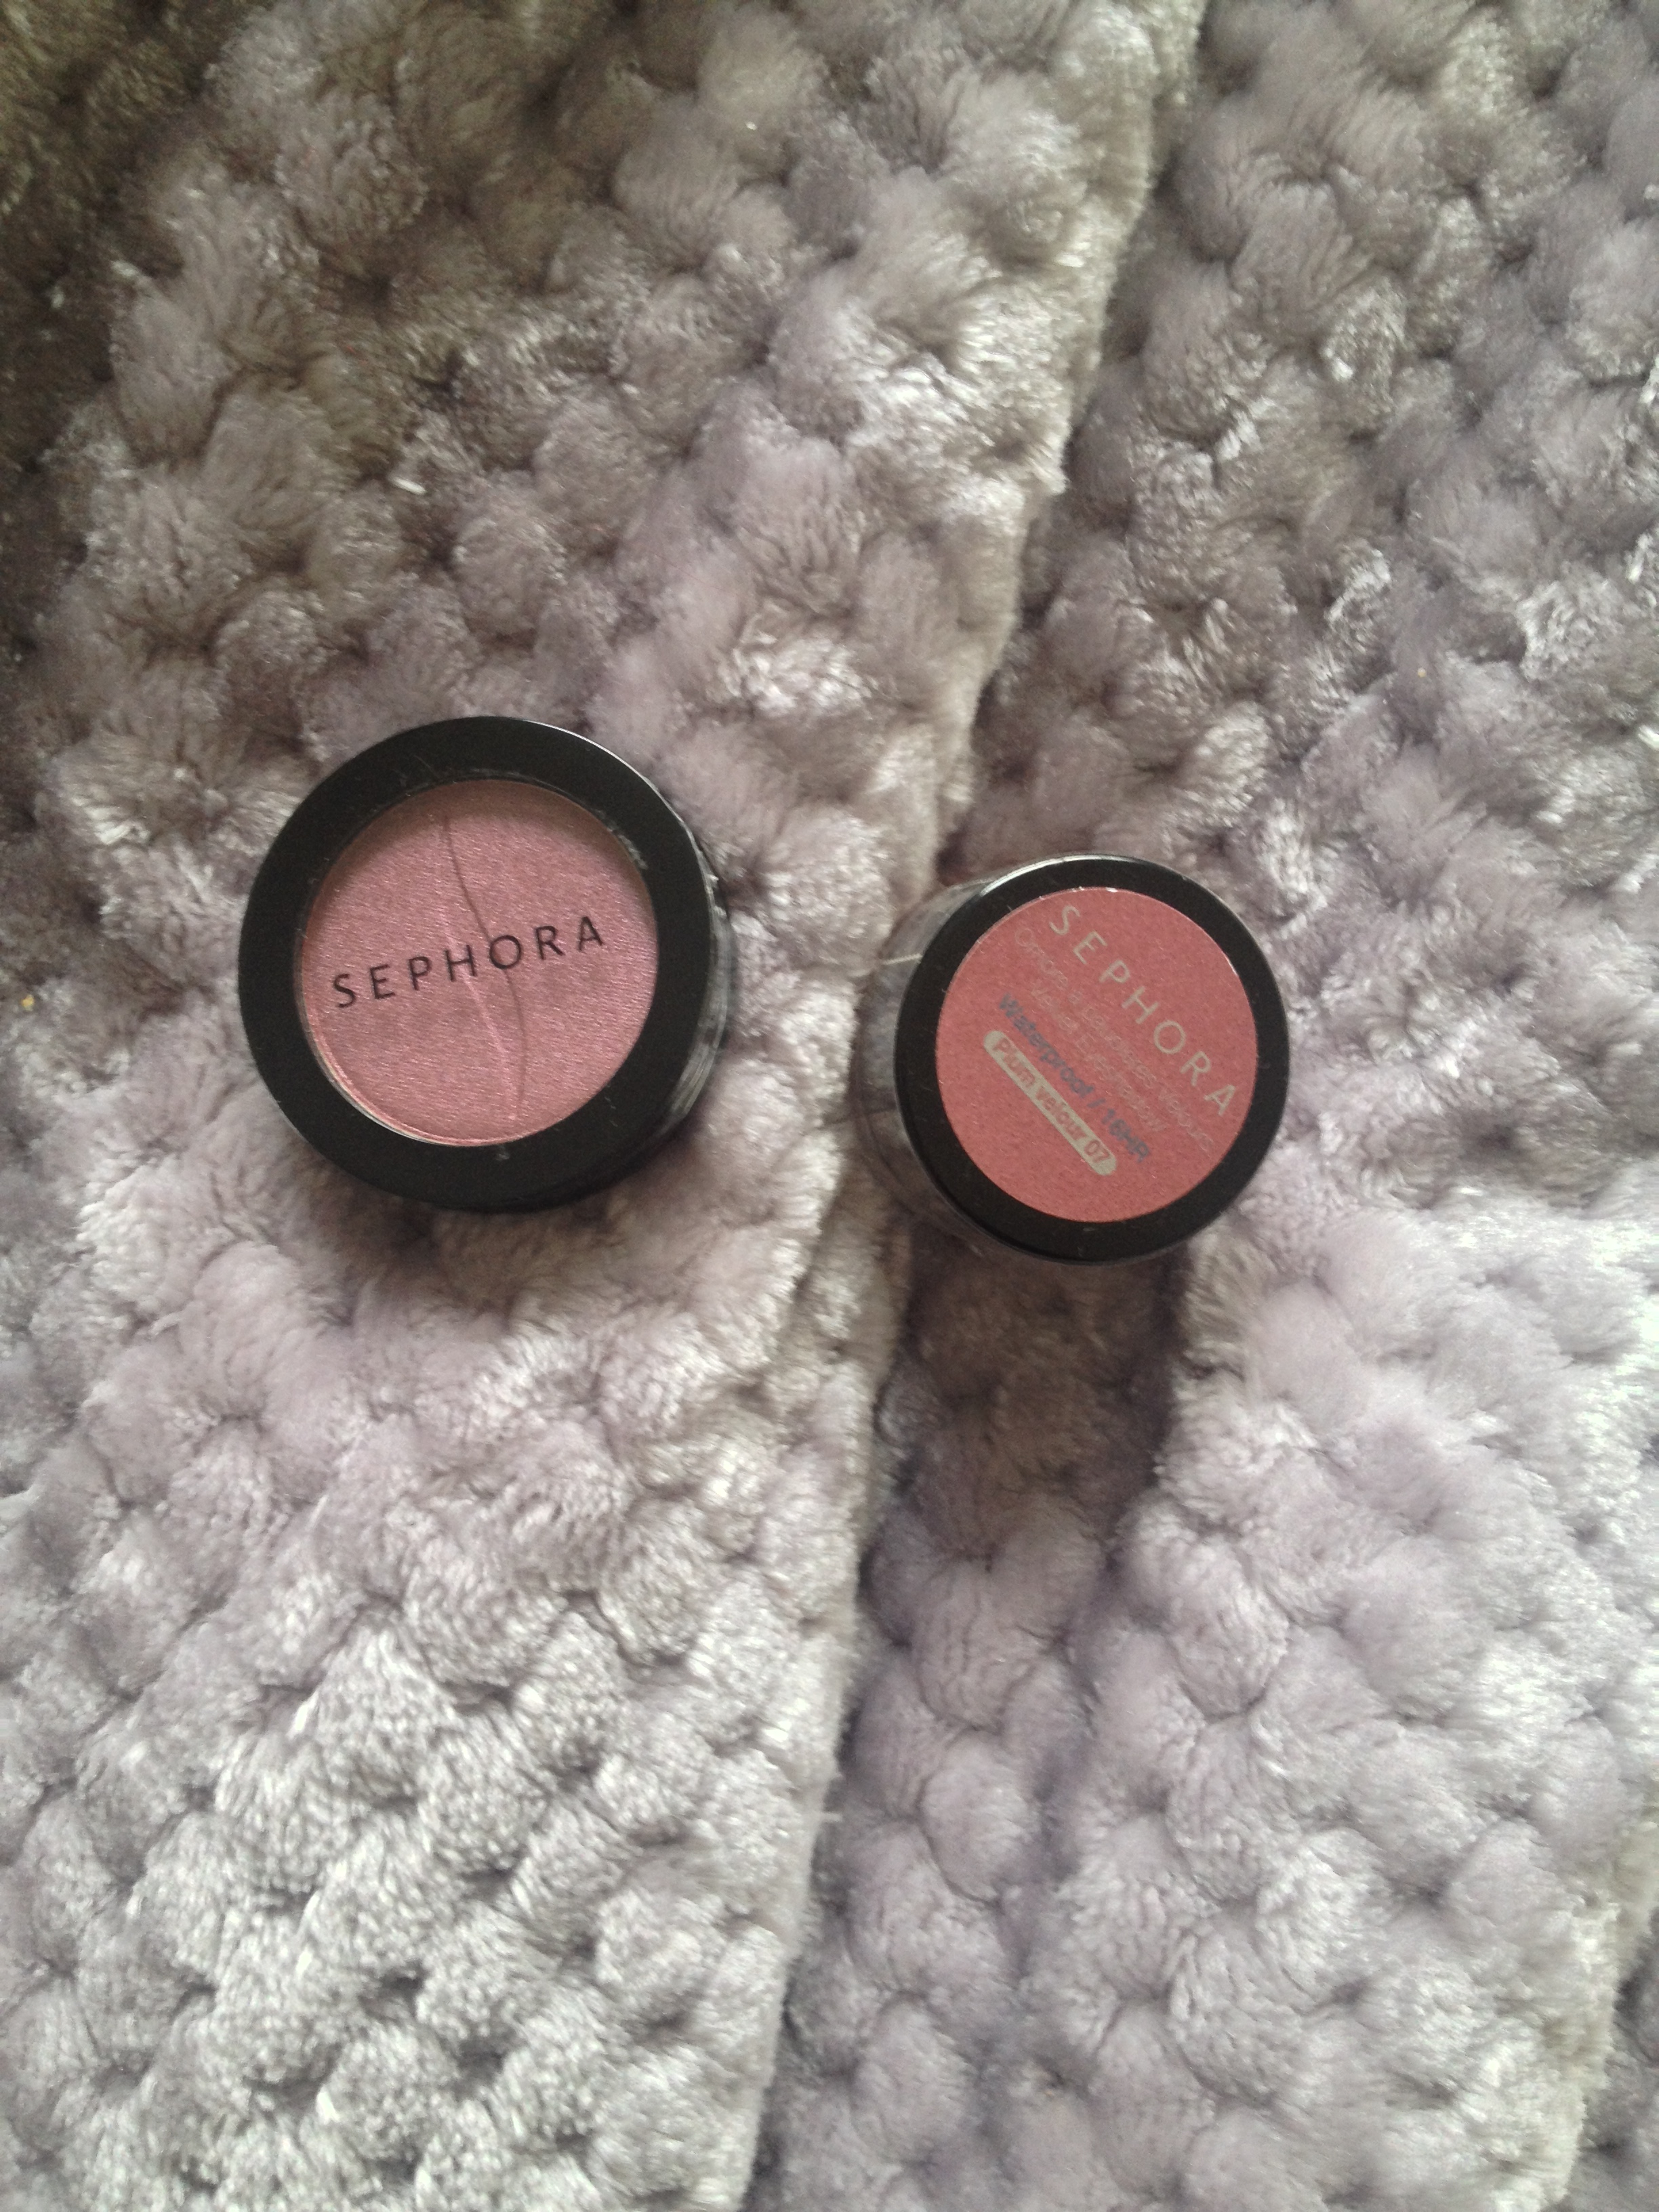
Blush was another tough category to choose from, but in the end I went with L’Oreal’s Visible Lift Blush in the shade Rose Gold Lift. It’s a beautiful rosey pink creme blush with a subtle gold micro-shimmer. You can use a stippling brush for a light look like I did here, or you can apply with clean fingertips for a more pigmented cheek.

Bronzer isn’t typically part of my everyday beauty routine, but I promised you a full face. I typically reach for this Boots No 7 Perfectly Bronzed Bronzing Pearls when I want to warm up my face a bit. I try to use a light hand with bronzer since my skin is naturally very fair. Here I just dusted my brush over my forehead, cheeks, and jaw line using the E & 3 method.

I also added a very small amount of highlighter over my cheekbones, for which I used The Balm’s Mary-Lou Manizer. This is another product that gets a lot of love, so I won’t gush but it’s a high-impact champagne colored highlight. For a more diffused effect, I recommend using a small stippling brush.

IMG_3375

So my favorite eye primer is Smashbox’s Photo Finish Lid Primer. It keeps my oily lids in check and also acts a perfect base. If I’m in a hurry, I smack this on and then run a matte shade through my crease. But that is obviously not what happened today…

Before I head into describing the specifics of my eye-look I want to mention my favorite brow product–Clinique’s SuperFine Liner for Brows in the shade Soft Blonde. I usually put my eye primer on and then focus briefly on my brows to give the primer time to set. This soft blonde shade matches my natural brow color perfectly.

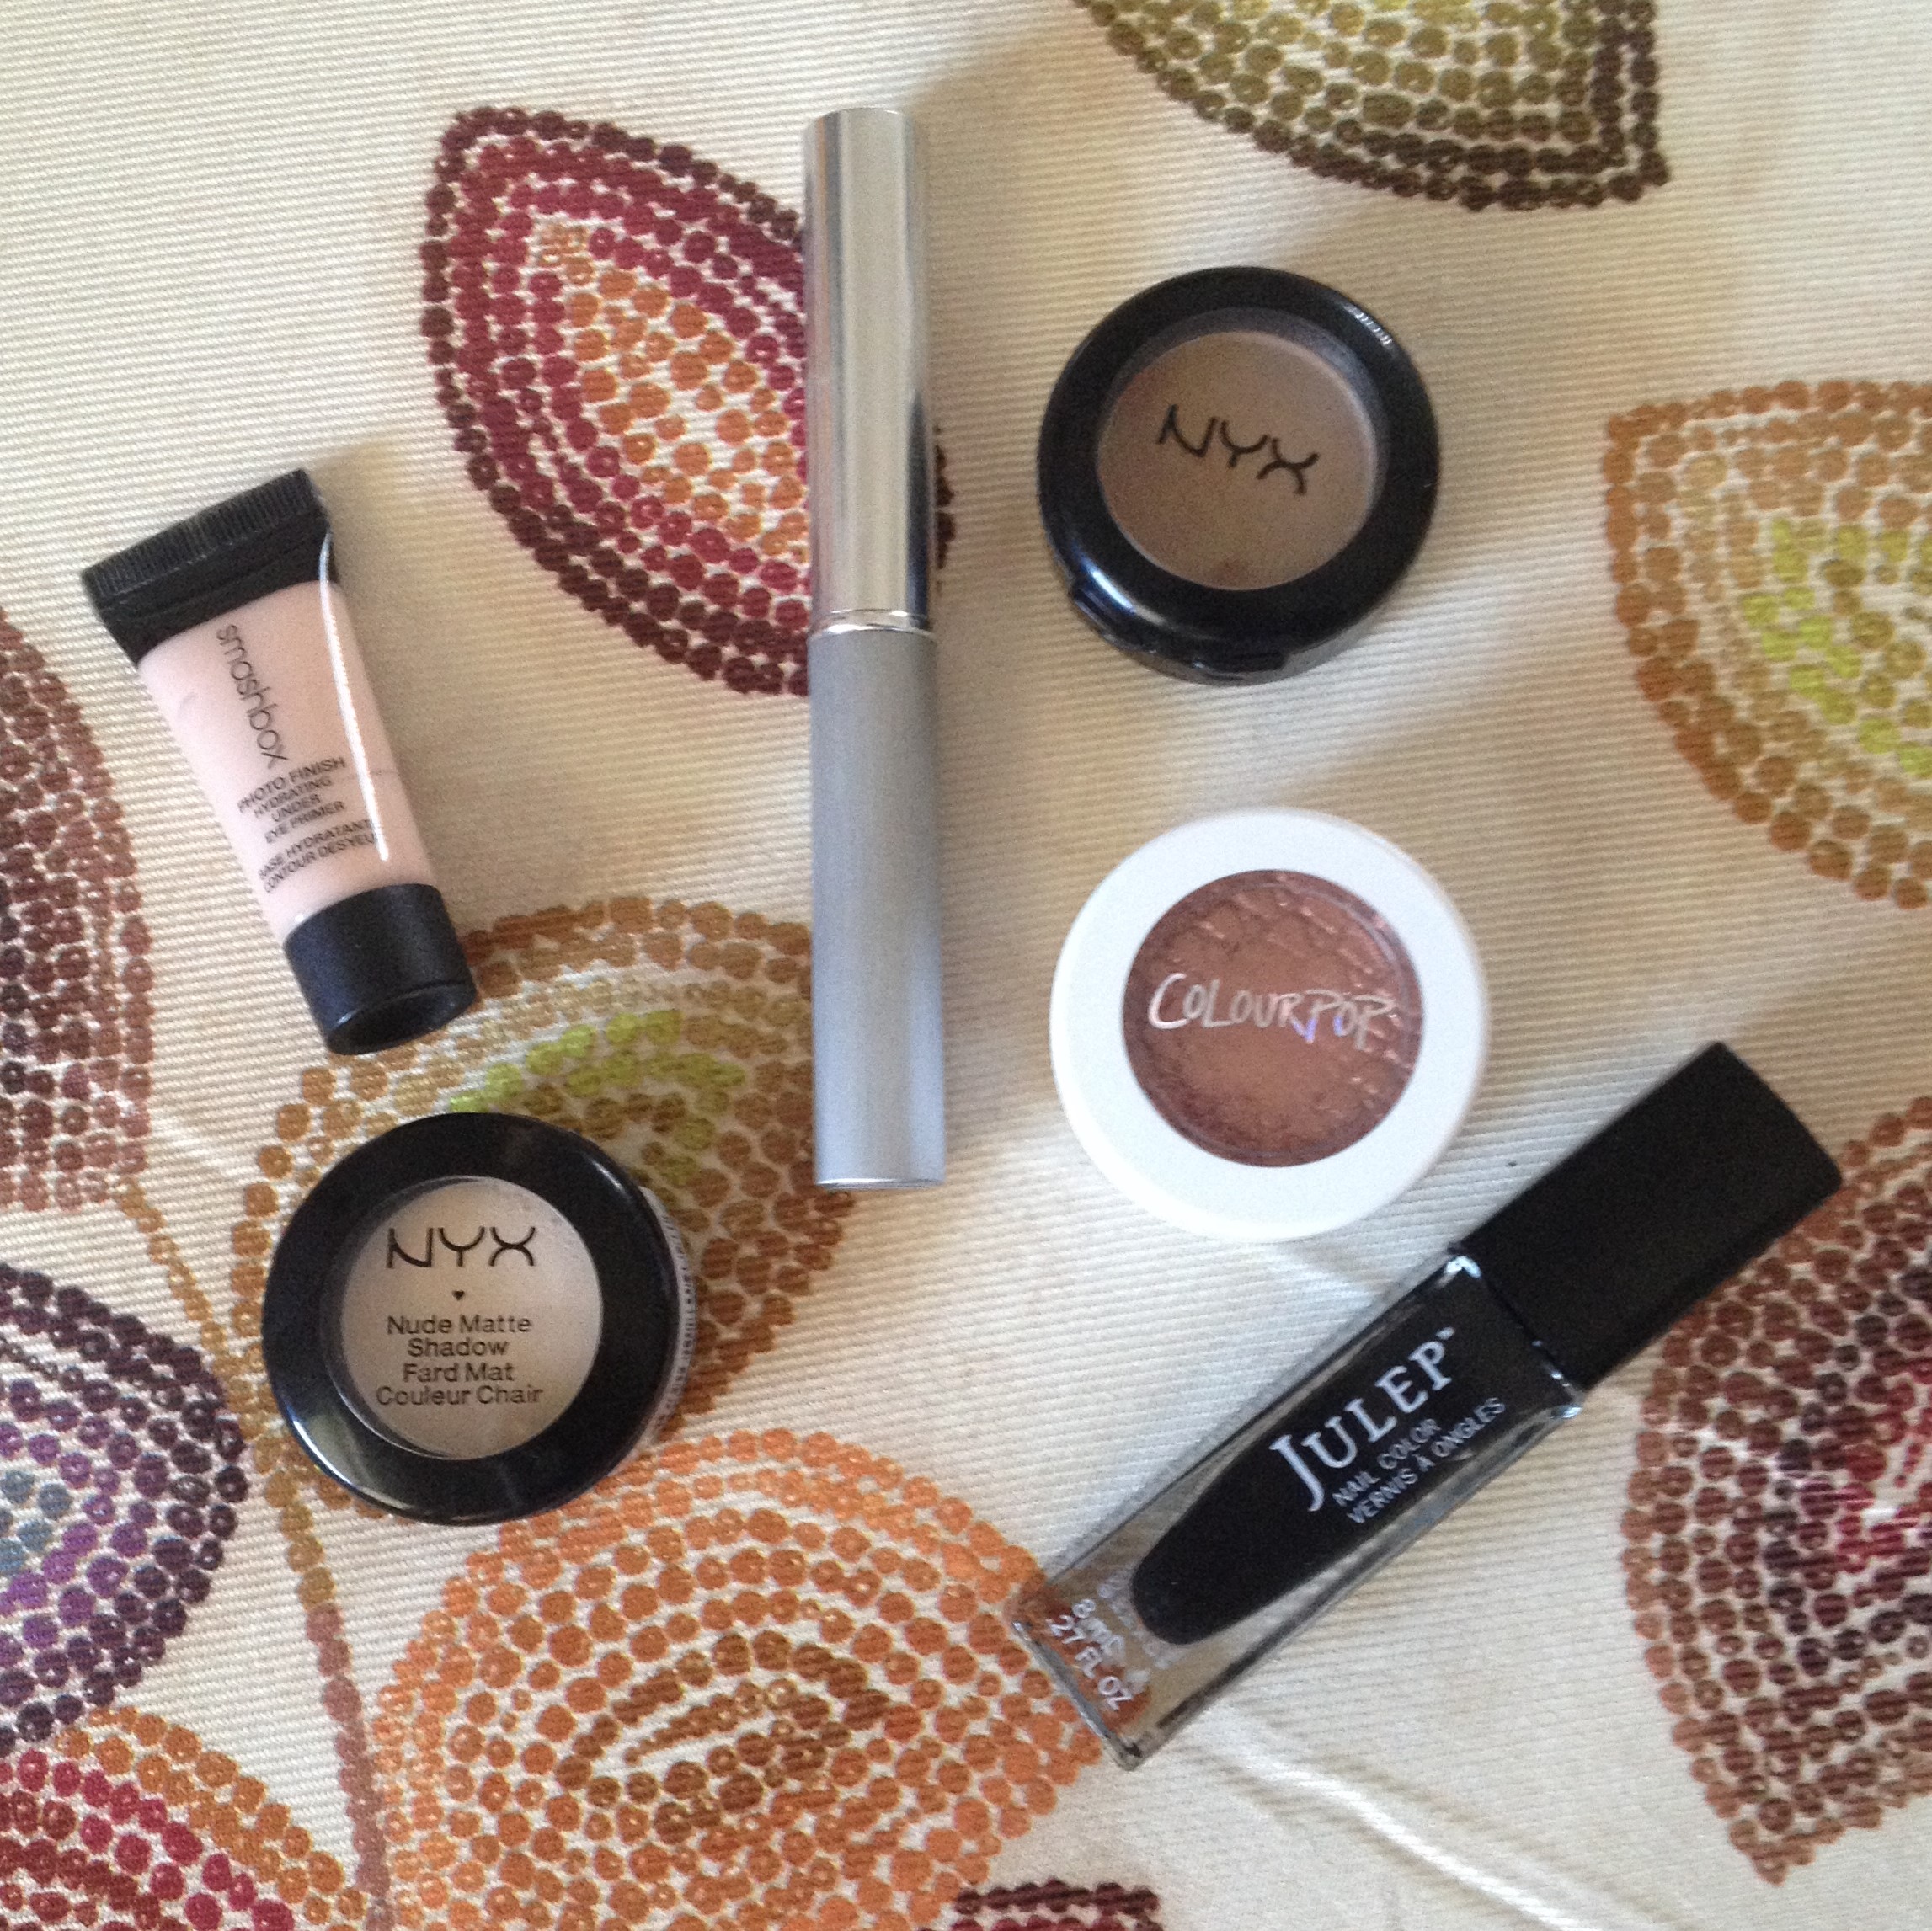
I have mentioned this next product in several posts so this shouldn’t surprise anyone, but I blended NYX’s Hot Singles Eye Shadow in Velvet into my crease. Velvet is my go-to crease shade and has been for months. It’s a warm matte brown that works on its own or is an ideal transition shade. I couldn’t do a favorite eye look without it!

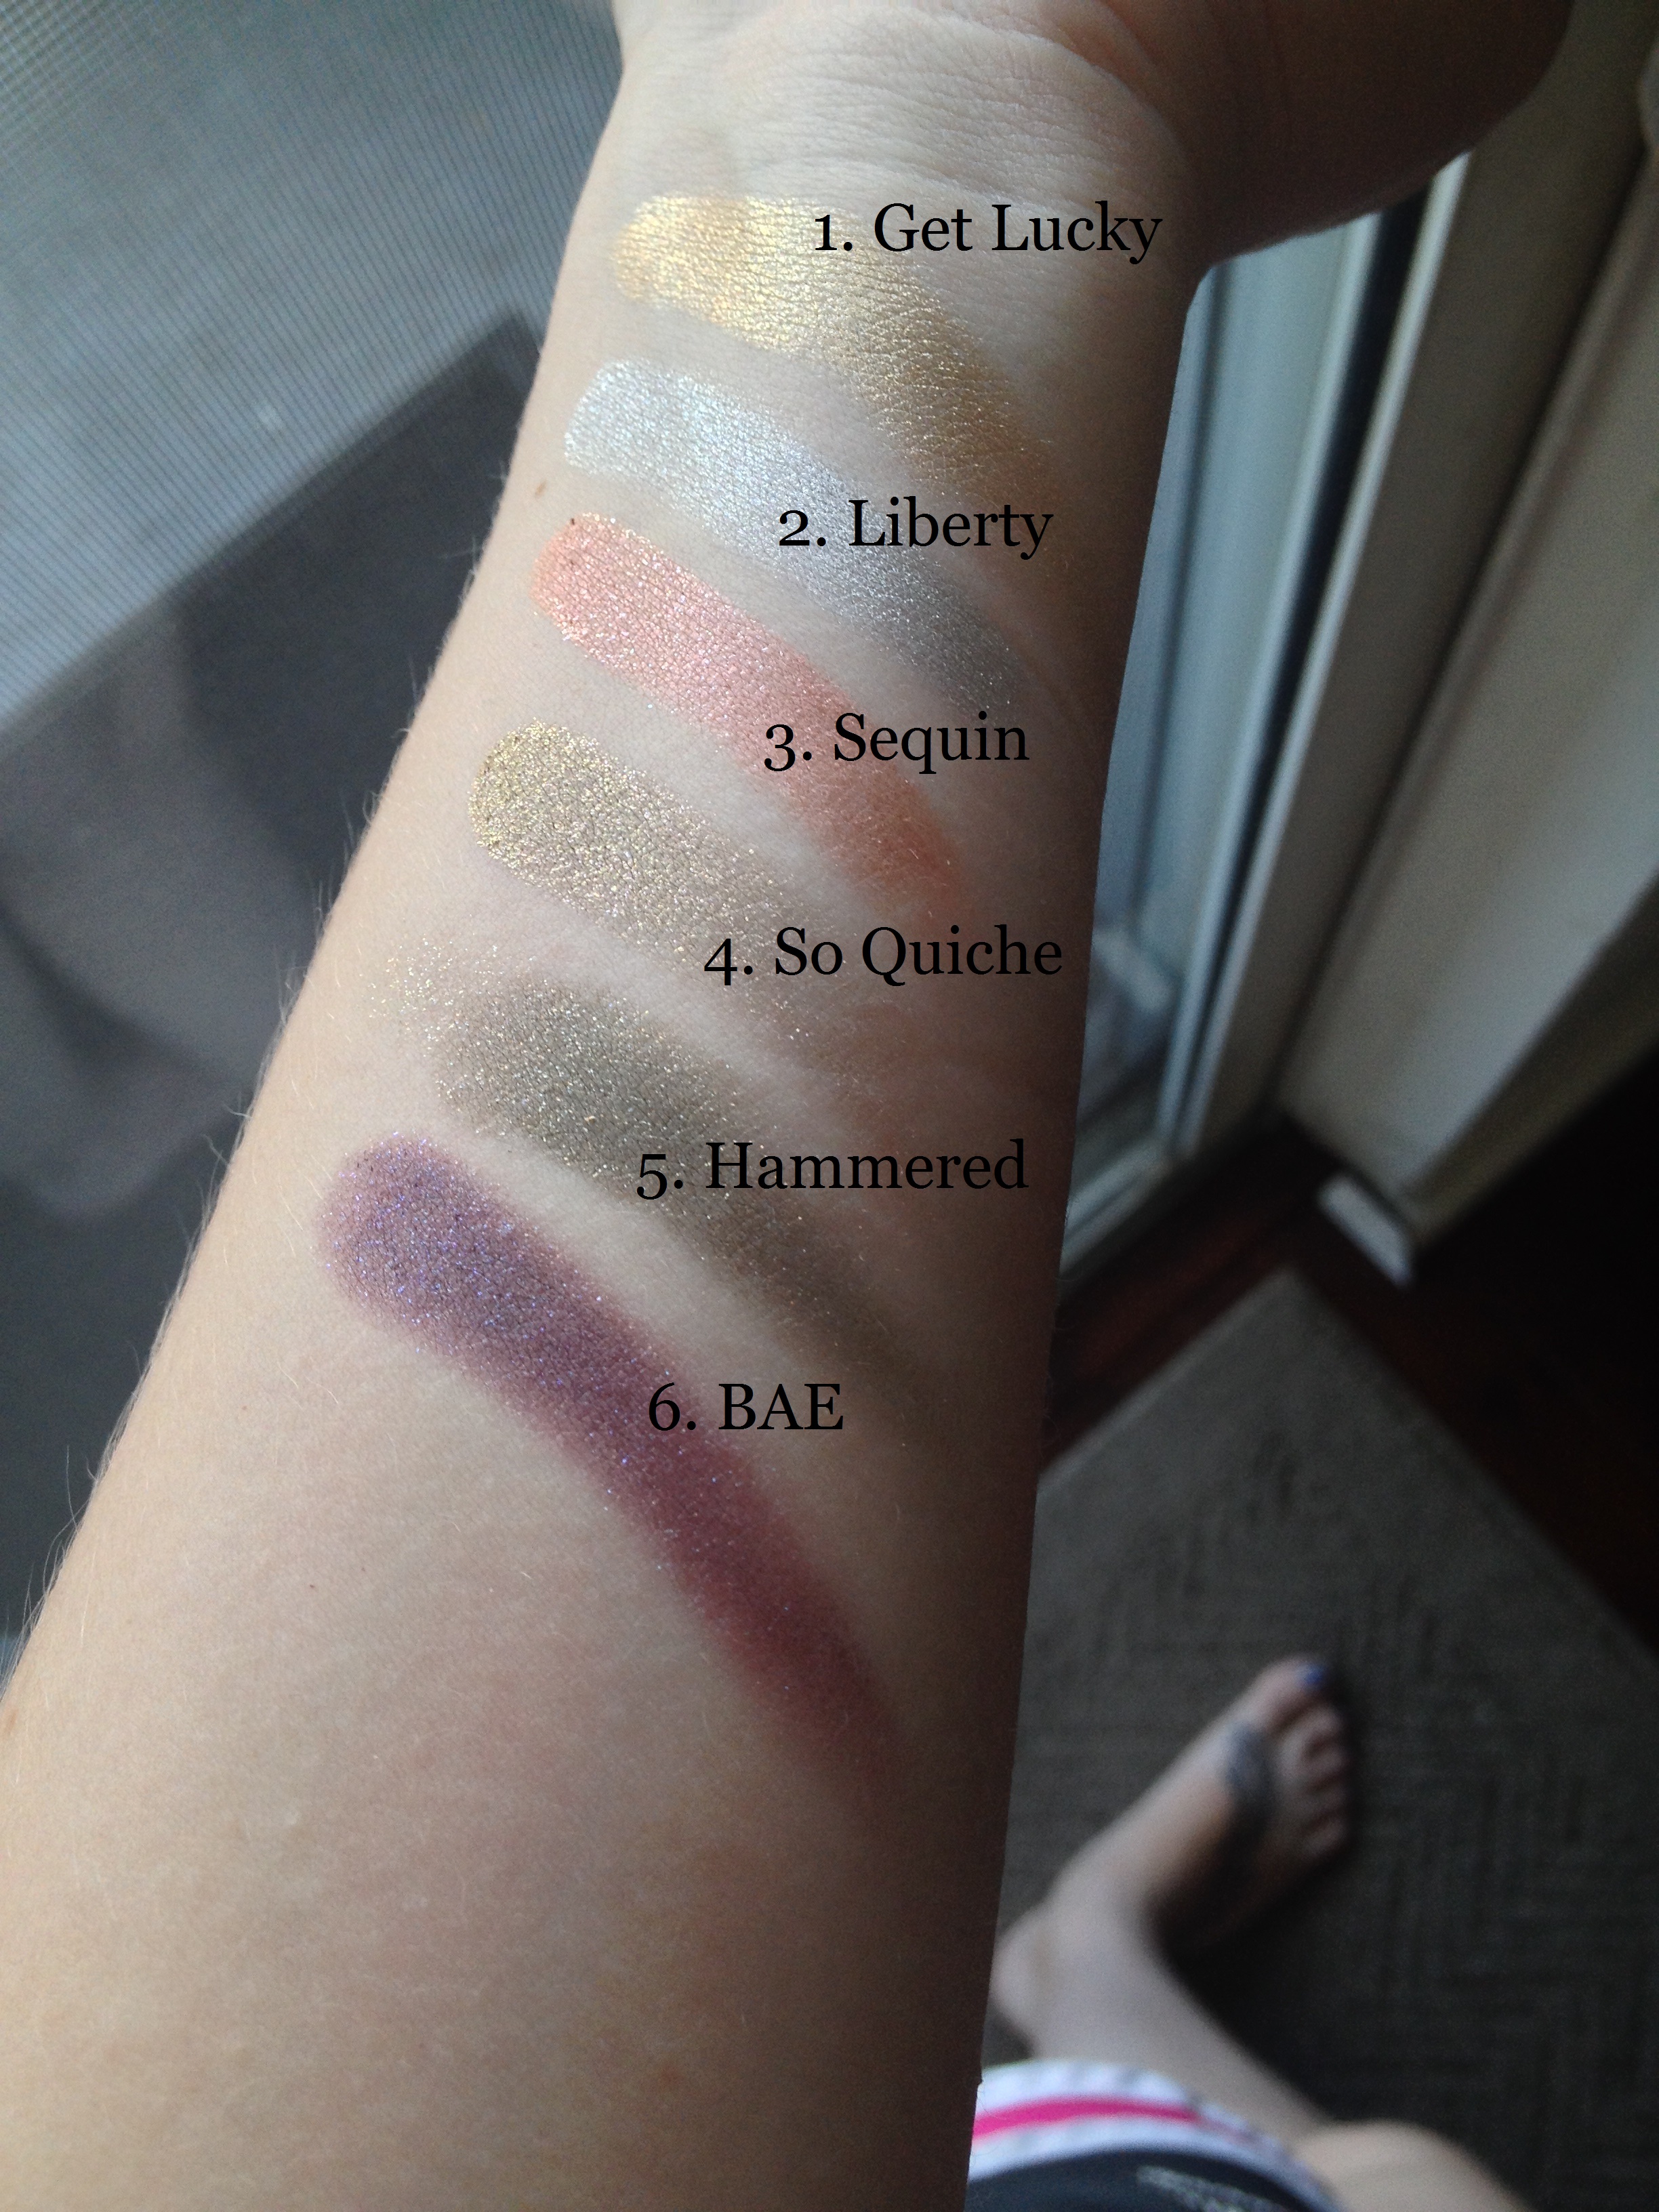
Another product that HAD to be mentioned in this post is a ColourPop eye shadow. I had a hard time just picking one, but I went with the shimmery copper shade called Sequin. I patted Sequin all over my lid for this look. ColourPop has been one of my favorite brands for 2014 and I expect that to keep going in 2015.

IMG_3394

IMG_3377

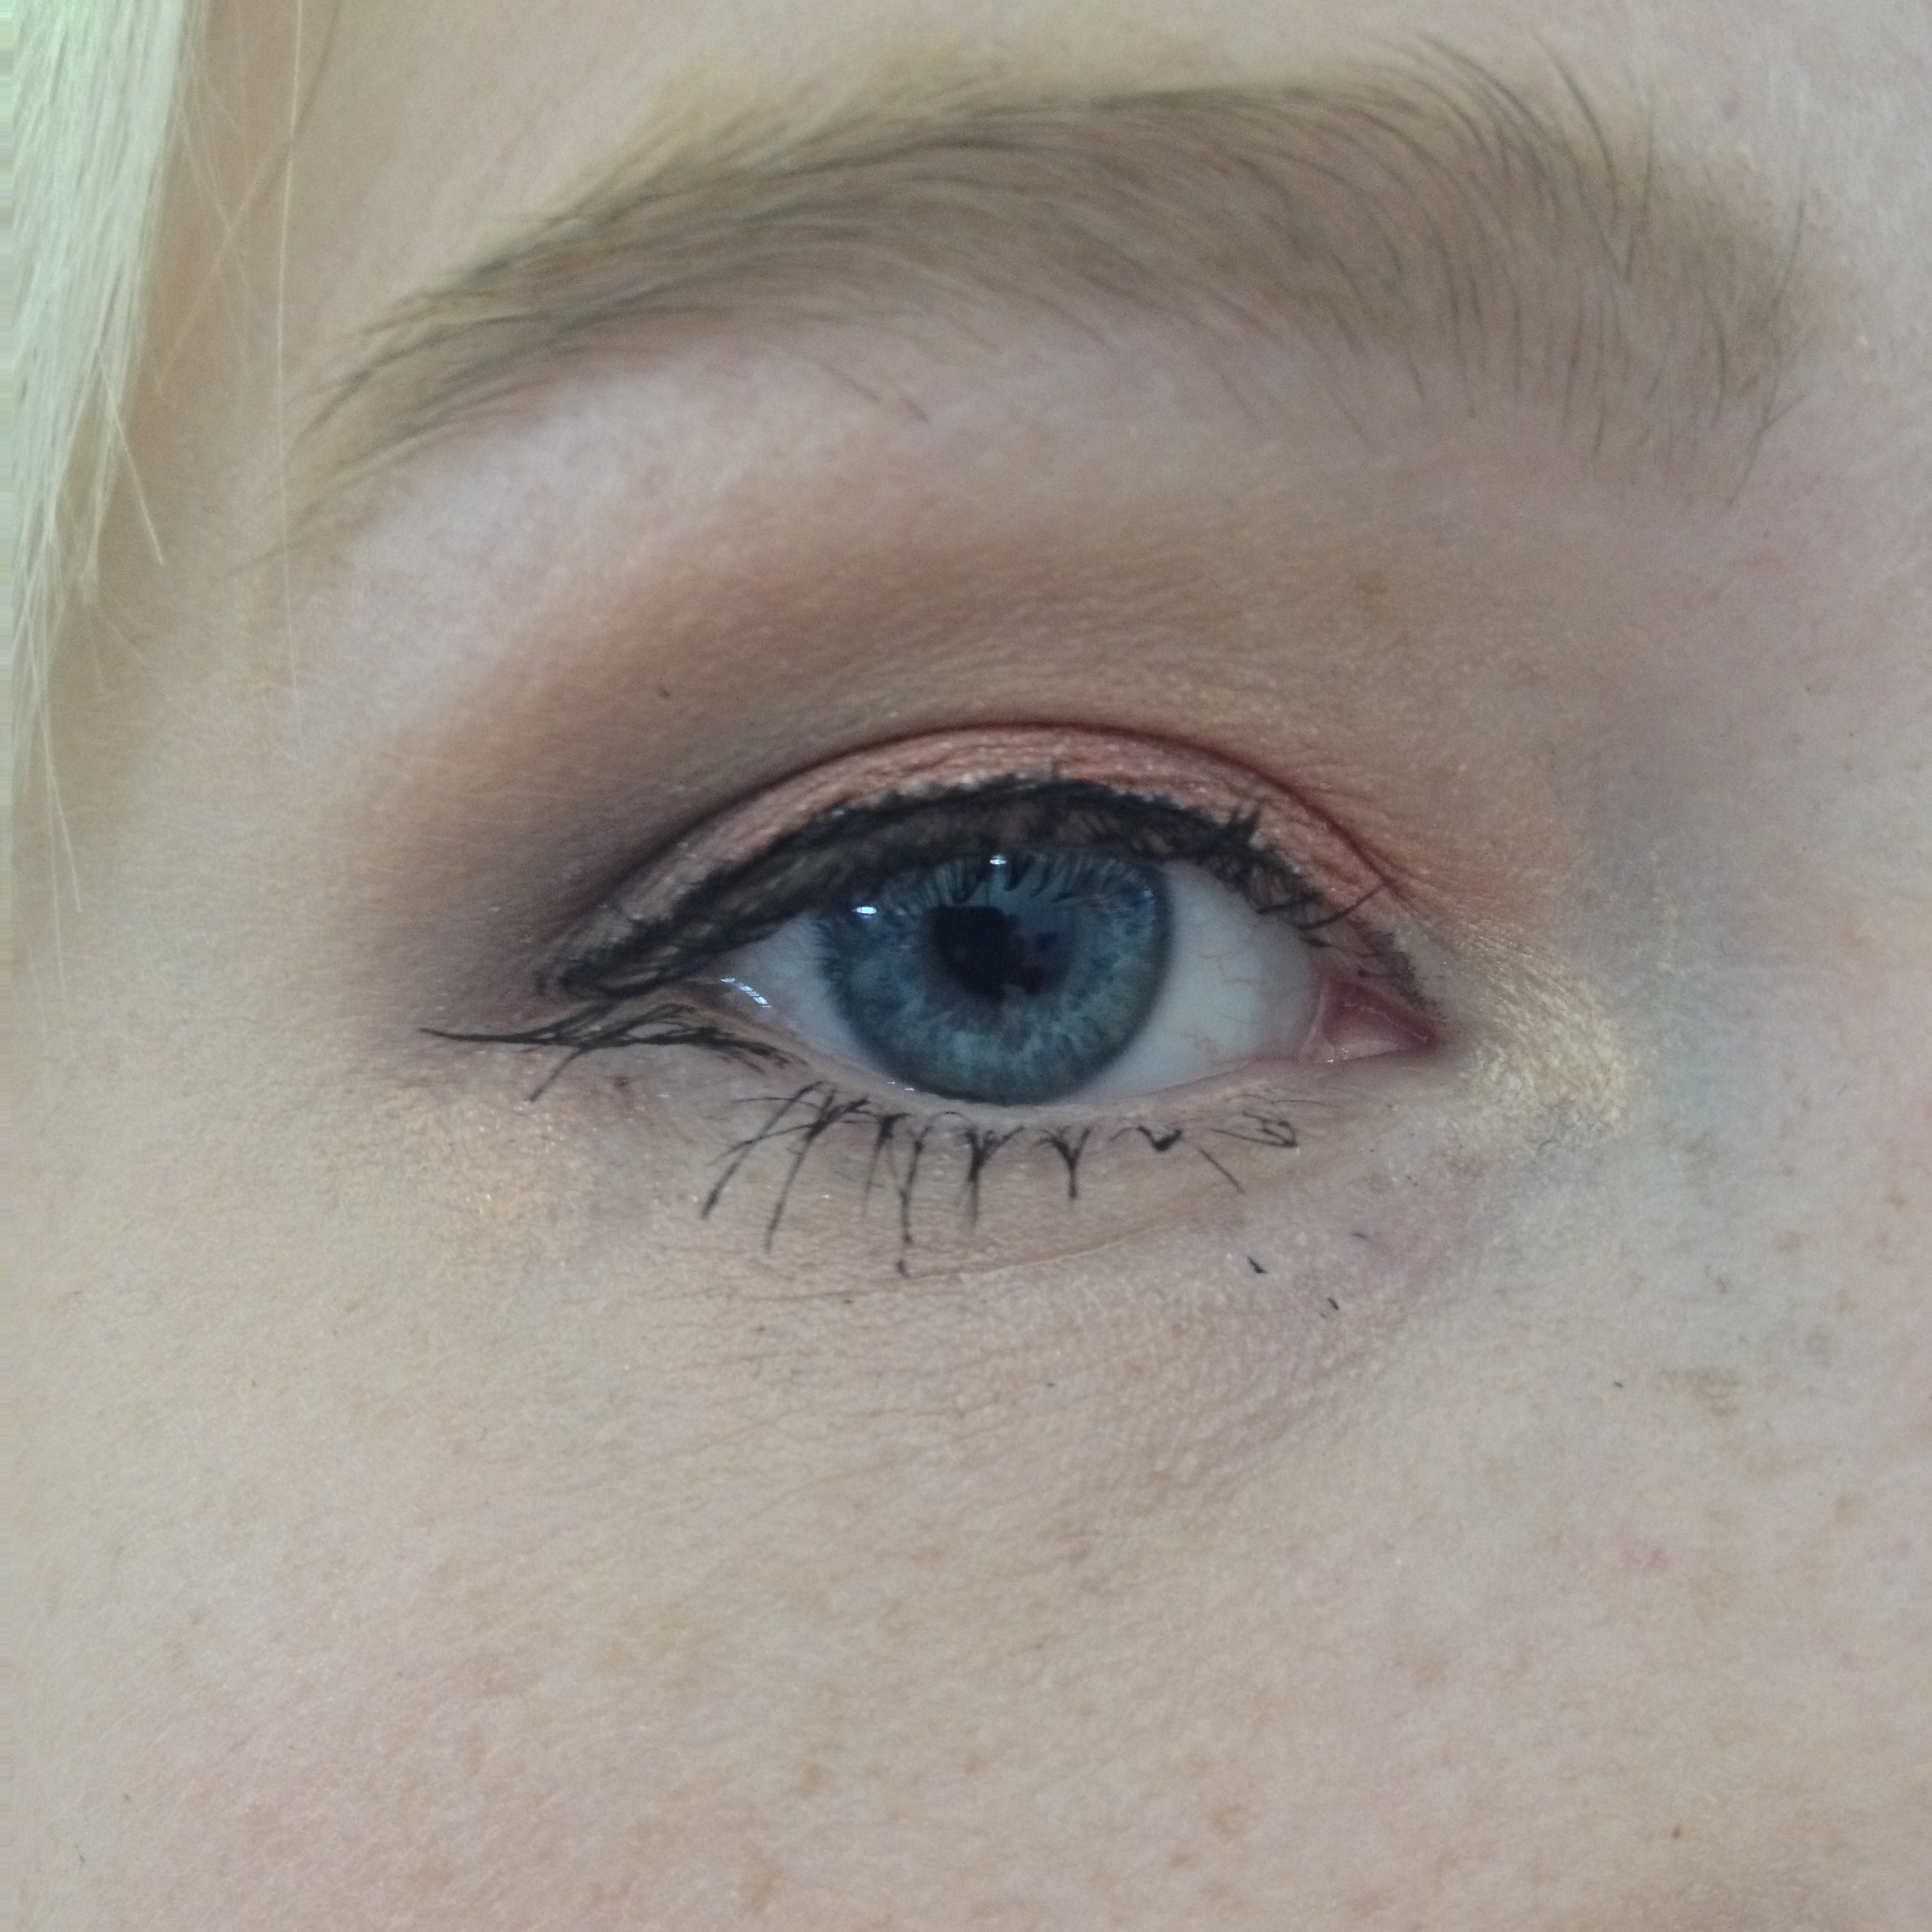
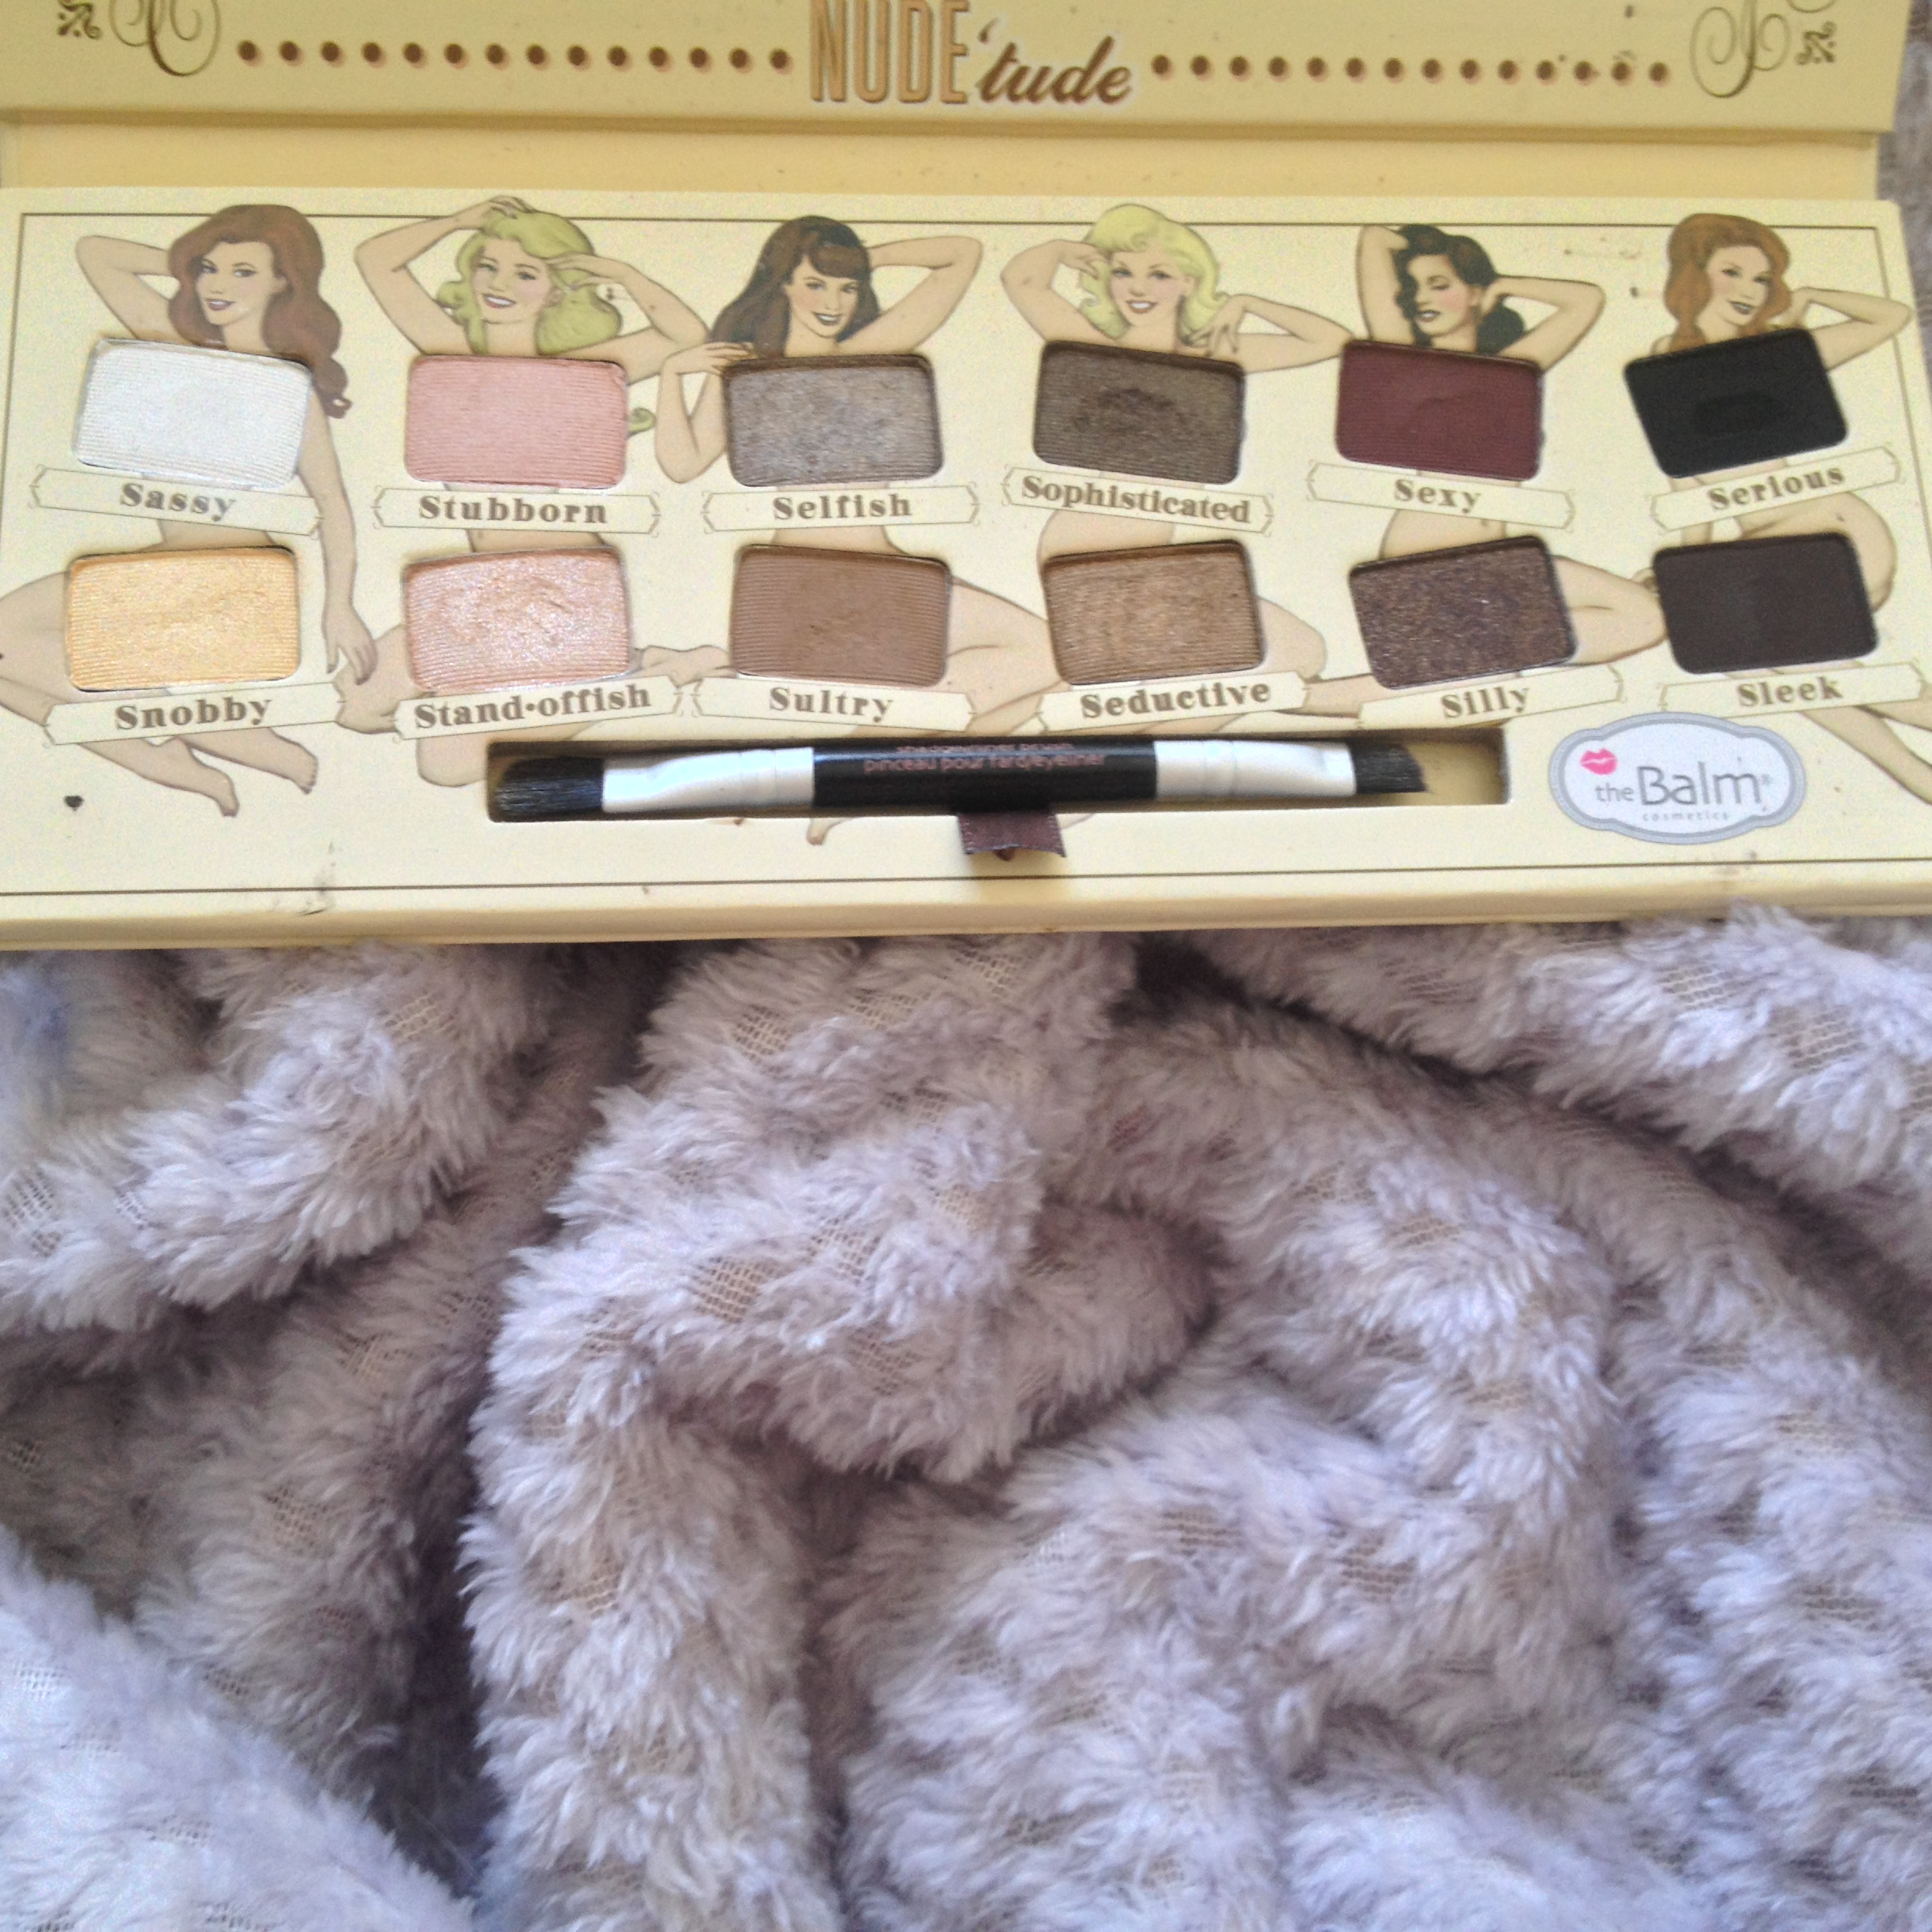
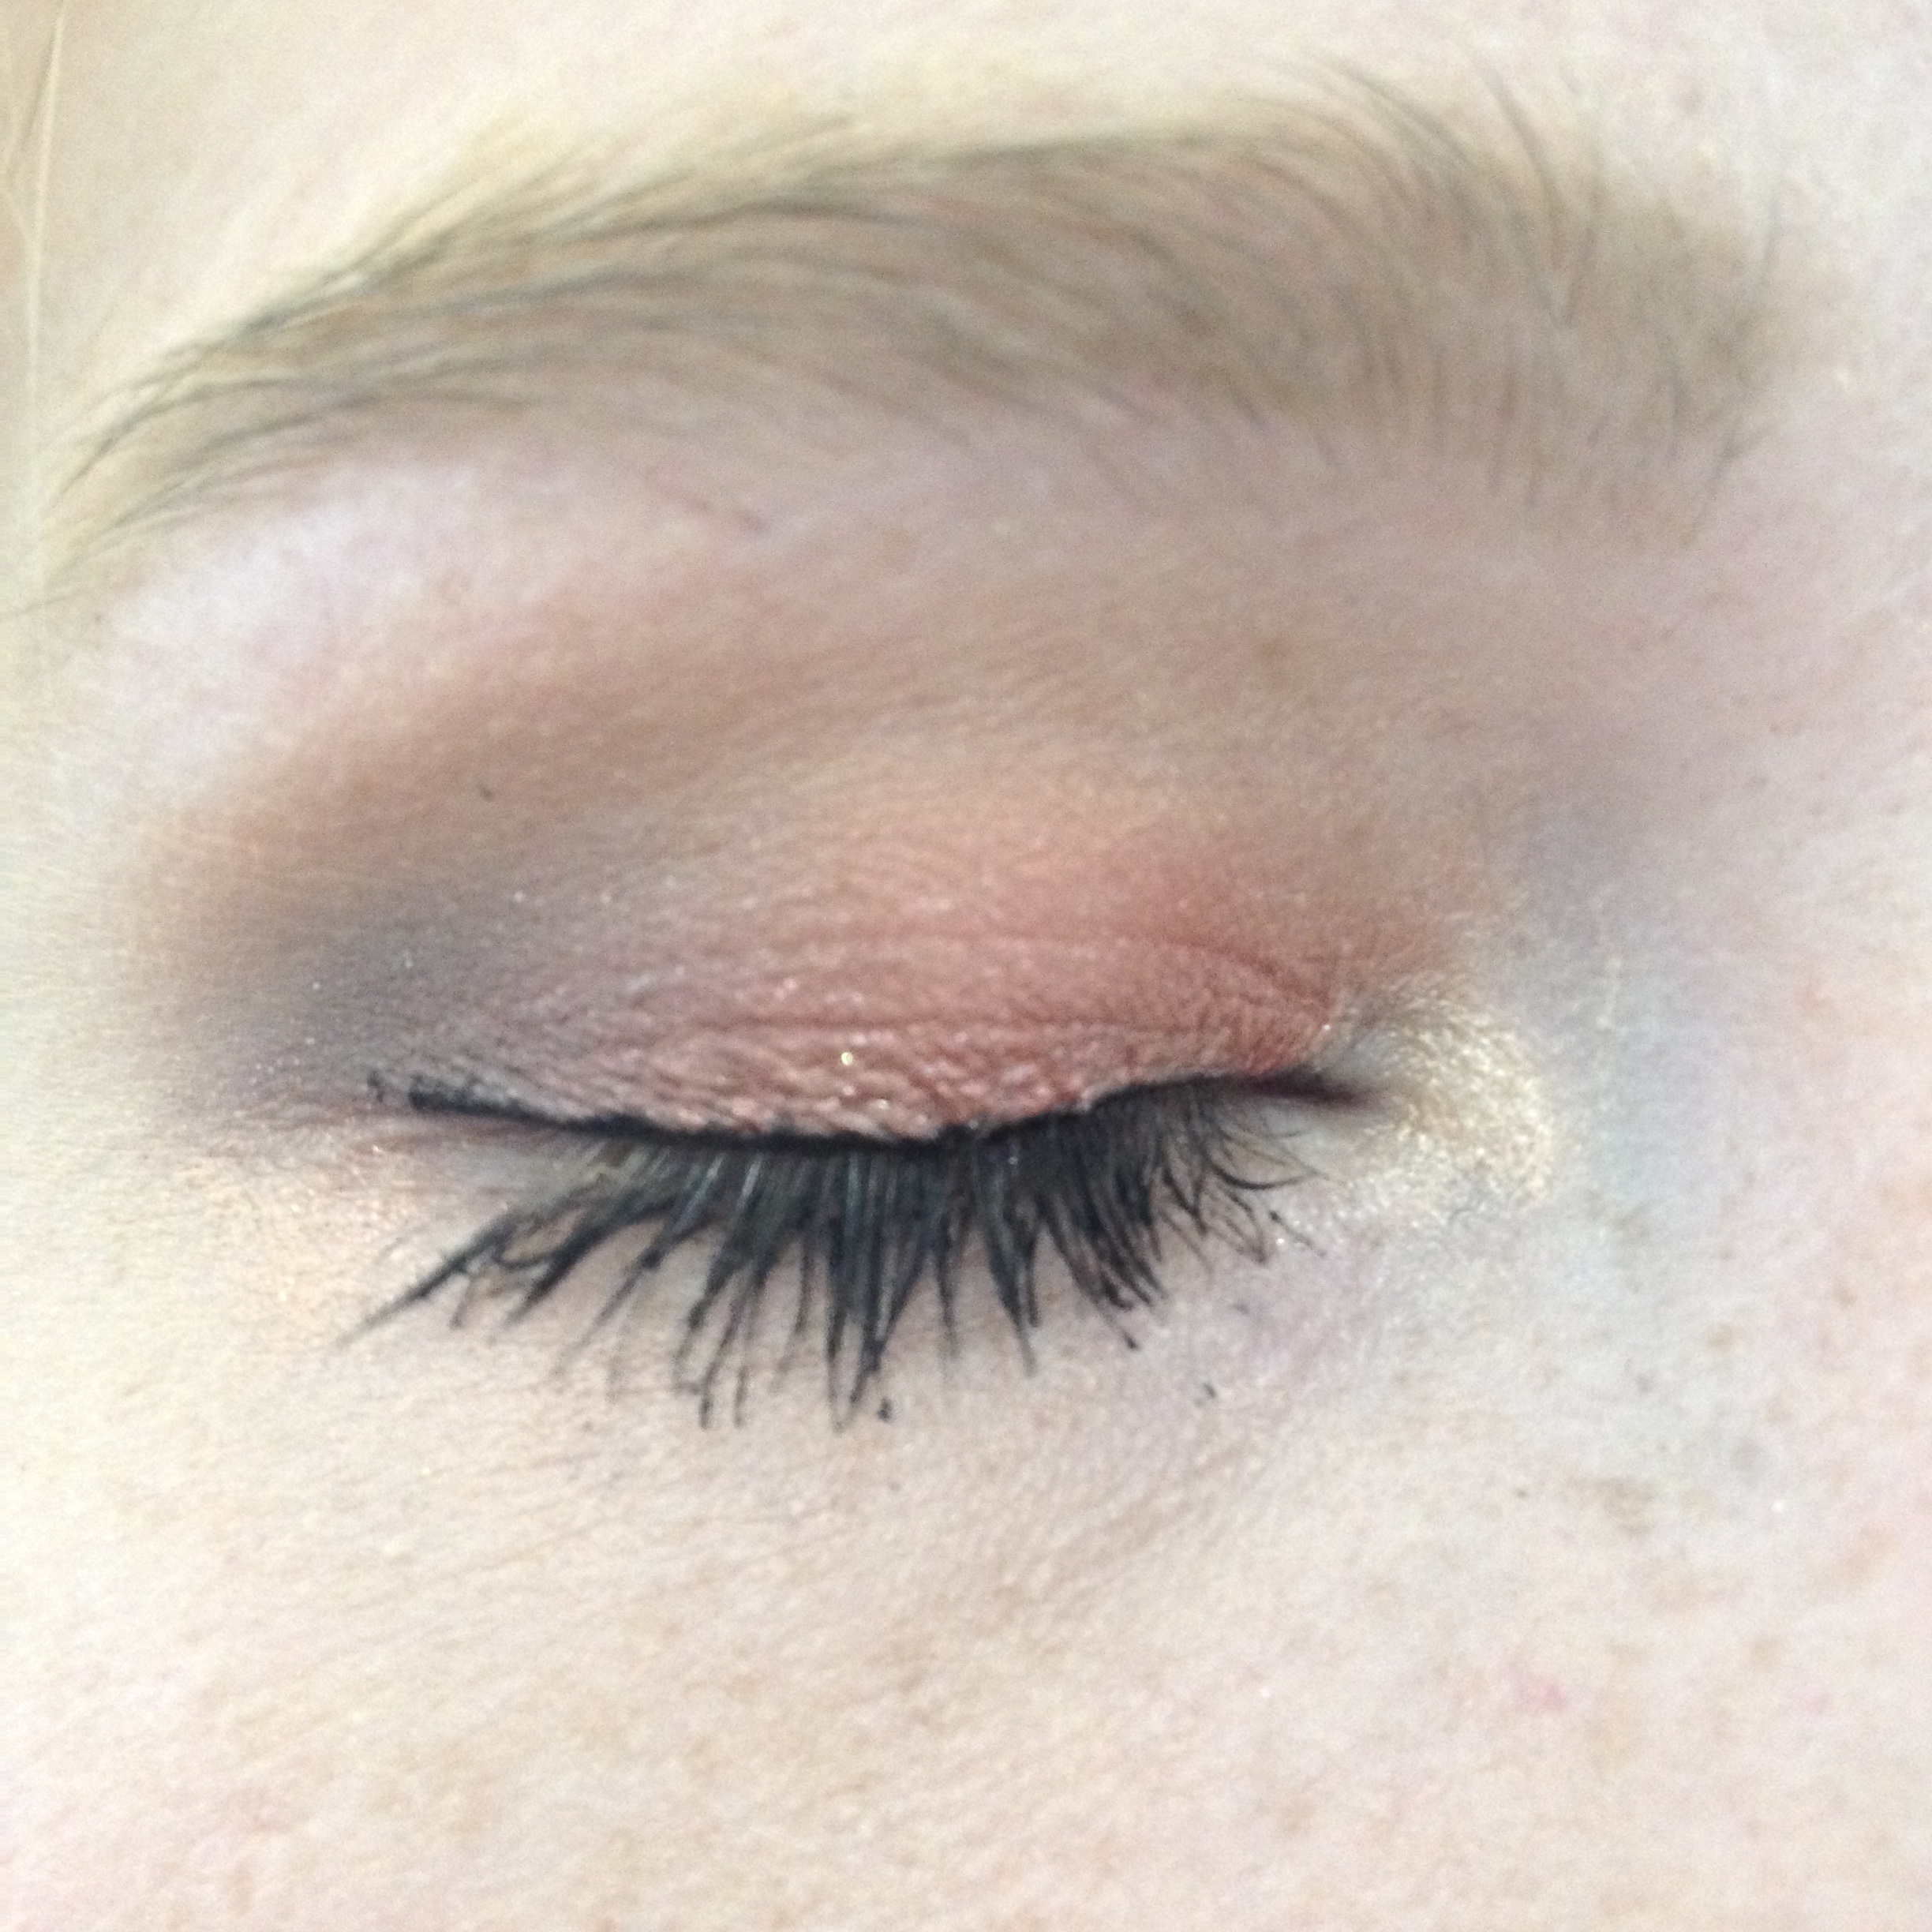
My favorite palette of 2014 couldn’t be ignored for this post: The Balm’s Nude ‘tude palette is a go-to for me. Using a very fluffy brush I lightly blended the blackened-red shimmery shade, Silly into my outer v. I also put Sultry into the crease to deepen the look. These shadows are all stunningly pigmented and buttery. It just feels good to put these things on my eyelids.

I also took Stila’s Eye Crayon in Kitten and placed it in my inner corner for a hint of shimmer.

Up close with my eyelid.

Up close with my eyelid.

IMG_3379

For eyeliner I used Jesse’s Girl Cosmetics Liquid Eyeliner in Black on my top lash line and Rimmel’s ScandalEyes Kohl Eyeliner in Nude for my lower waterline. I love the Jesse’s Girl Liquid Eyeliner for smooth application and a matte black finish, while the Nude Rimmel liner is perfect for a subtle widening effect when used on the lower waterline.

Then for a favorite mascara, the easy choice was Benefit’s They’re Real! Mascara. I love that Benefit makes these travel sized tubes available for purchase. This mascara gives me great length and volume with minimal clumping. I will say it’s a tough one to get off, but the formula doesn’t end up on your under eyes either, so it’s a bit of a trade-off.

Swatches from Top to Bottom: NYX's Velvet, ColourPop's Sequin, Silly from the Nude 'tude palette, Seductive from the Nude 'tude palette, Stila's Kitten, Rimmel's ScandalEyes liner in Nude, and Jesse's Girl eye liner

Swatches from Top to Bottom: NYX’s Velvet, ColourPop’s Sequin, Silly from the Nude ‘tude palette, Sultry from the Nude ‘tude palette, Stila’s Kitten, Rimmel’s ScandalEyes liner in Nude, and Jesse’s Girl eye liner.

Here are some better swatches of the products I used on my eyes. Almost to the end here, so stick with me!

IMG_3381

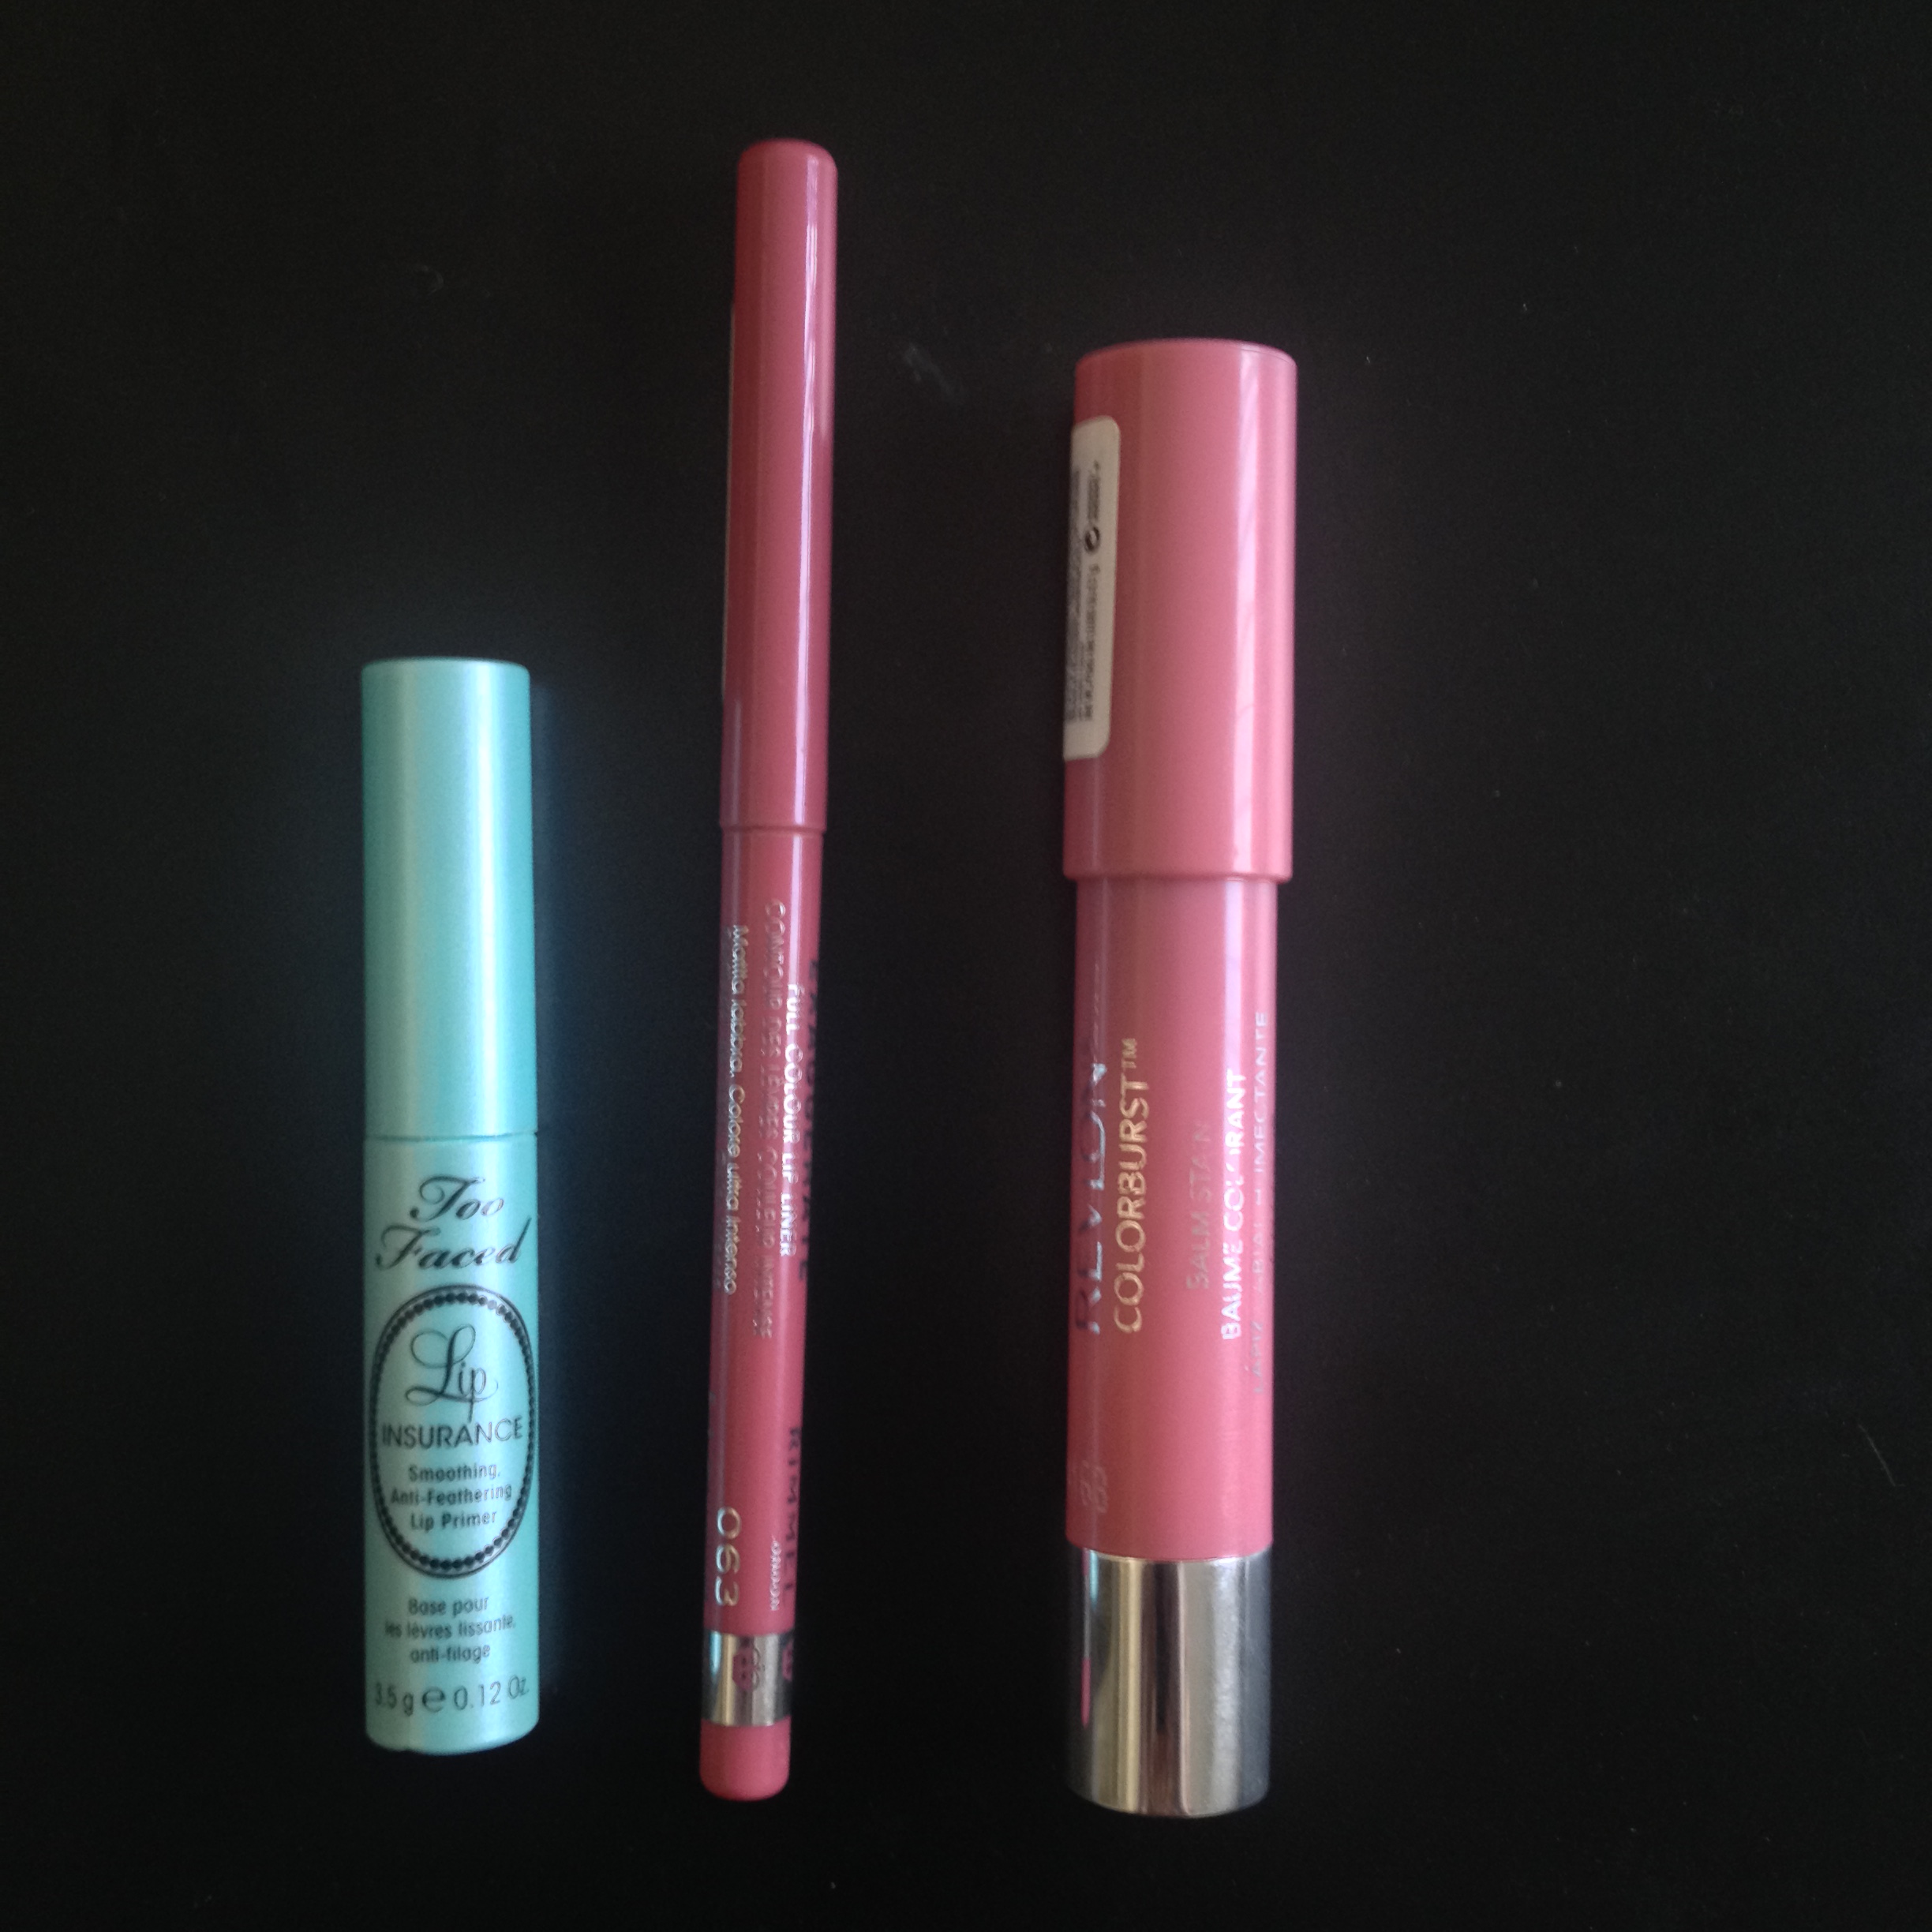
Like I said before, primers were a big part of my 2014, and Too Faced’s Lip Insurance made a noticable difference with my lip products. It helps keep lipsticks in place and it’s become a must have in my daily routine.

Another Rimmel product that is a fabulous basic to have in your arsenal is the Exaggerate Full Colour Lip Liner in Eastend Snob. I can and have worn this shade by itself as a perfect rosy matte lip color. I love how precise this lip liner is and how good it feels on my lips. Big fan.

And finally, the last product is my Revlon Colorburst Balm Stain in Honey. The mint smell is great, as is the staining power of this formula. But I also can count on this product to not dry out my lips. This kind of rose-toned pink has dominated my lip product selection in the past year, and it will be interesting to see if I stick with it for 2015.

A shot in natural lighting of the full look.

A shot in natural lighting of the full look.

Phew! I know that was a long post but thanks for sticking it out with me. I usually don’t wear this much makeup on a day-to-day basis, but it’s always fun to play with your favorite products. Hope you enjoyed my roundup of my favorite beauty products for 2014!

Thanks for popping in!

Happy Haulidays Part 2

If you tuned in for my first Happy Haulidays post, you saw all my fabulous drugstore finds from December. And now I bring you my high-end Hauliday post.

IMG_3346

I was super excited to snag this holiday set from Sephora! Fresh Sugar lip balms are some of the absolute best (but pricey) balms on the market, so these little minis are worth every penny. So far the cherry shade gives a really great red stain and the berry is a toned down purple-pink. Each of these has SPF in it too, which is lovely. So often I forget about needing SPF on my lips but it’s equally important as the rest of your skin!

IMG_3348

This is a new to me product that I received at Christmas, but if you couldn’t tell from above, I’m a big fan of lip balms. The Lip Slip by Sara Happ is beautifully packaged but also light on the lips. I need to play with it more to speak properly to how well it hydrates but I’m excited about this new lip balm!

IMG_3354

I have been pining away for this palette since its release and finally caved when Ulta was having their 20% off sale in December. It felt like a victory to get this palette for less than its retail price. But I love the smokey grays and purples in this Too Faced palette.

IMG_3356

This was an impulse buy in the winding checkout aisle at Sephora (you know that aisle has gotten to you too). I’m a big fan of Dr. Jart + products. I have another of their BB creams in the black bottle. One is a radiance cream and the other is labeled Multi-Action skincare, so we’ll see how these go. But again, hurrah for SPF!

IMG_3358

This was a repurchase for me. I already had a mini Benefit They’re Real mascara that I adore but it’s nearing its end. My lashes get such great volume and shape from this mascara. It’s tricky to get off but that doesn’t bother me for the results I get.

IMG_3360

I bought a couple of Sephora brand products as well. The eye shadow on the left is the shade Hold Me Tight and the cream eye shadow on the right is called Plum Velour. I’ve always been a little intimidated by the red-toned pinks or deep reddish-purple shades because they can make your eyes look bruised if you’re not careful. But since Marsala is the color of the year, I’m giving these shades a chance.

IMG_3364

This is also a Sephora brand lipstick and all I can find on the packaging is Sephora Rouge Shine No 11, so I’m assuming this shade doesn’t have an official name. But it’s a pinky-brown creme lipstick with a hint of glossiness on the lips. A good all year shade.

IMG_3365

The final two items of my Haulidays posts are the Bare Minerals BB 5 in 1 eye shadow in Soft Linen. I got a sample of another shade months ago from ipsy and these eye shadows are amazing. They stay all day with no creasing or fading and provide an excellent base for various eye looks. I wanted a softer toned shade than the one I got in my subscription box and this pale beige is the perfect base for everyday, natural makeup.

The other item is a Sephora eye liner in a sparkly black called Galaxy. What made this shimmer stand out is that it’s blue-green micro-glitter, and it glides on smooth without pulling or scratching. I’m a big fan of the Sephora brand and while it’s pricier than the drugstore it also has a wonderful variety of trendy or classic shades throughout their product ranges, so they’re worth trying out.

There you have it my high-end Haulidays are complete. I hope you all had a pleasant New Year and are already finding new products to love. Let me know if you’d like a review on any of these products in the comments below.

Thanks for popping in!

October Favorites

Ack! Sorry I’m so behind this month! The last few weeks have been a tad crazy (in the best way possible) but things have finally slowed down enough for me to do an October favorites post.

So without further delay, here are my favorites for the month of October!

Just a few of my favorite things.

Just a few of my favorite things.

Smashbox Photo Finish Hydrating Under Eye Primer (full size $29.00)

I got this tiny tube in one of Smashbox’s try-it kits at some point within the last year. But for the last few months this under-eye primer has become a staple of my makeup routine. Not so much for the priming aspects, but for the hydration. Recently, the skin under my eyes has been more prone to drying out because of a clinical strength face wash I’ve been using, so this little primer keeps that very tender skin hydrated and smooth throughout the day. I don’t need much, which is why after months of daily use this thing still looks full.

Jet by Julep ($14.00/$11.20 as a Maven)

This is my favorite black nail polish. As a brand, Julep is a tad expensive but they’re also vegan-friendly and 5-free, which I find comforting. I’ve used this creamy black shade in several of my October manicures and it has made its way into being a staple of my collection. Jet is currently out of stock on the Julep website, but hopefully they’ll bring her back soon!

From left to right: Velvet, I Have a Headache, Sequin, and Black Honey

From left to right: Velvet, I Have a Headache, Sequin, and Black Honey

NYX Hot Singles Eyeshadow in Velvet ($4.49)

This milk-chocolate matte shade came in one of my ipsy bags and has been used almost daily since. I would say 90% of my eyeshadow looks have Velvet blended into the crease as either a transition shade or as the prominent color in the crease. The texture of this shadow is a little on the powdery side but it blends beautifully. I can’t seem to stop using this eyeshadow.

NYX Nude Matte Eyeshadow in I Have a Headache ($4.99)

I bought this shade last year because I thought the name was hilarious. It wasn’t until the last few months that I started using this shadow nearly everyday. For my skin tone, I Have a Headache is the perfect brow bone highlight. It’s a very subtle look, and that suits me just fine.

ColourPop Eye Shadow in Sequin ($5.00)

I adore each of my ColourPop shadows, but lately I’ve been drawn to the shiny copper color of Sequin. I think the metallic copper makes my blue eyes really stand out. And this shadow is so easy to swipe over the lids. I’ve used this and Velvet in the crease for a stunning eye look that takes less than five minutes. And for the price tag, this stuff can’t be beat.

Clinique’s Almost Lipstick in Black Honey ($16.00)

When I saw how dark this lipstick appeared in the tube I was a little bit intimidated. But on the lips the color is so sheer that it only slightly darkens your natural lip tone for a flushed look. I think this lipstick would be flattering on a wide variety of skin tones, and the formula is rather moisturizing which should be a crowd pleaser. This has been my go-to lipstick to throw on before leaving the house. It doesn’t last all day but it fades nicely and gives a great natural look.

Just for fun, I decided to add my favorite movie and book from this month too.

Favorite Movie:

Gone Girl. I didn’t write a review on this one because I was gobsmacked by this film in the best possible way.

Favorite Book:

The Blind Assassin by Margaret Atwood. For my full review, check here.

That wraps up my favorites for the month of October!

Thanks for popping in!

ColourPop Cream Eyeshadows

Let me introduce you to my latest obsession, ColourPop Shadows.

Even my coffee table likes these shadows.

From Top Clockwise: Sequin, So Quiche, Hammered, BAE, Get Lucky, and Liberty

ColourPop exploded onto the makeup scene within the past month with YouTubers like Kathleen Lights raving about the amazing shadow pigmentation and shine of these metallic cream shadows. The best part? They’re $5.00. And the brand has promised to always price their items at $5.00 because they believe beauty should be fun and affordable. Bless them.

And for those of you who are rocking cruelty-free only cosmetics (woot), ColourPop does not test on animals. They’re also extremely forthright in listing all their ingredients for every shadow, so you know exactly what is going into each product.

Thus far I have six shades: Get Lucky, Liberty, Sequin, So Quiche, Hammered, and BAE.

Swatches

Swatches

These cream shadows are silky to the touch and are best applied with your fingers. A little bit goes a long way for all-day sheen and wear. I also don’t experience creasing with any of these shadows.

ColourPop specializes in metallics and sparkle, with no mattes yet added to their collection. But my-oh-my are their metallics good.

Get Lucky and Liberty are part of the ultra-metallic line and have a liquid-like sheen that lasts all day. Both of these shades are so pigmented that swatch just as strongly the second time around.

Sequin is a nice coppery shade that has great shine. So Quiche is a golden brown with subtle flecks of purple.

Hammered is an olive-green with dark gold glitter. And BAE is a deep purple with blue glitter that has a near duo-chrome shine as this shade changes dramatically in the light.

My favorite way to wear these are to pat them all over my lid with a warm brown in the crease. Simple, quick but bold eye look!

Make sure you seal these up tight when you’re done so they don’t dry out!

I have had to stop myself from buying too many colors. I will definitely purchase more shades in the future. ColourPop also has a line of lippie stix and lip pencils. I haven’t tried any of them as yet, but these lip products are also $5.00 each.

Because it’s still a small company, there are still some personal touches that cemented my budding brand loyalty. Each of my purchases came with a handwritten note thanking me for my business with tongue in cheek wit. I kept each note because it put a huge smile on my face.

I give ColourPop Cream Shadows 5 Beauty Bubbles! If they ever start making matte shadows then I’m in real trouble.

Thanks for popping in!

Clinique Full Potential Lip Gloss

Technically, this is more like ten tries, but the goal and intent of my 5 Tries post is still alive and well here: using up and exploring neglected items in my makeup drawer for review! With that in mind, I bring you Clinique’s Full Potential Lip Glosses.

The Full Potential Lips Glosses in their mini glory!

The Full Potential Lips Glosses in their mini glory!

I bought a pack of dual ended glosses at the duty-free in South Korea last October. So while these were still being sold around this time last year, they are no longer an active part of Clinique’s regular range. However if you like any of the shades here they can still easily be found on Amazon or eBay.

Each of these mini tubes has .07 oz of lip gloss, which makes them great for your purse or for travel. The tiny glosses have a doe foot applicators and you’ll likely have to dip back into the tube to get the best color effect possible. The glosses also have a very faint mint scent, but there is no tingly quality that you usually associate with lip plumpers.

The gloss formula is sticky but not tacky, which is an important distinction for gloss lovers. Personally, the slight stickiness doesn’t bother me. It feels light on the lips.

Average wear time was probably 45 minutes to an hour. Some of these glosses lasted about an hour with the shine diminishing along the way and others felt like they did not stay put on my lips for more than twenty minutes. But I’ll specify which of these is which down below. If you’re eating or drinking do not expect these glosses to stick around, so if you’re wearing them out take the tube with you.

Adding in a Bit of Honey

Adding in a Bit of Honey

For the lip swatches, I decided to use NYX’s butter lipstick in Bit of Honey as a base, and I’m so glad I did this. Bit of Honey is a pale nude shade that neautralized my lips’ natural mauvey tone, which ended up being great for the swatches because the Clinique Full Potential Lip Glosses are almost all sheer with hints of color. If I hadn’t used a light nude shade as a base, I don’t think you would have been able to see some of the colors. Even with Bit of Honey some of these shades do not come through strongly. But you’ll see that in the swatches.

IMG_2734

As you can see, my natural lips shape did not get overly enhanced by these glosses, at least in the plumping department. The ones that did do a bit of extra plumping are pretty obvious in comparison. You can also see what NYX’s Bit of Honey looks like on my lips; just a light subtle nude. I think having Bit of Honey on under these lip glosses also helped keep my lips moisturized, since the Butter Lipstick line is quite nourishing. Anywho, on to the Clinique!

For swatch descriptions, I’m going to talk about what the color looks like in the tube (which I’ll put in italics) and then describe the gloss on the lips.

Double PlumA rich plum toned red. When I first applied this shade it appeared darker and then by the time ten minutes had elapsed and I was ready to take a photo the shade had faded out significantly. I also found this shade to be the most drying.

Mimosa BlossomA warm rose shade.This color came out more mauve on my lips than in the photo, which is a good thing. All of these shades are extremely sheer: sometimes I like that and sometimes I don’t. So the little hint of mauve was welcome.

Cherry Bomb-A bright fuschia. One of the brightest colors in the tube but on the lips this gloss is barely distinguishable from the pale pinks and nudes in the collection.

Play-Full PlumpA soft blue-toned pink. There was next to no color payoff with this shade.


IMG_2662

Luscious LilacBarbie pink with a touch of purple. I think I wanted this shade to have just a touch more purple-y pink. This is one of the shades that did not have much color payoff.

Glamour-FullA warm mocha tone in the tube. One of my favorite shades from the pack. It’s a warm nude-brown and has one of the best color payoffs though it is still quite sheer when you consider the color in the tube. I also think this shade did one of the better jobs at plumping.

Sooooo PinkRose-y toned pink. Yes, there are that many “o”s. I checked. This gloss is the truest match from tube to lip. A lovely subtle pink gloss.

Pink AplentyA deep mauve. This shade required a lot of reapplication. You can tell from the swatches that my lips were not as shiny and I took each of these pictures maybe 15 minutes after finishing my makeup to allow the plumping part to do its magic.

Peach PlumpPale peach. On my lips this shade came off more nude with a hint of rose, so I’m not sure why it looks deep pink in all my photos. And of these six swatches, my lips look the fullest. I also felt that this shade left my lips feeling soft, which is not a claim the brand makes in any way, but it was different enough that I made a note about it!

Ripest ApricotWarm tan toned gloss. Another shade that needed a lot of reapplication. But I didn’t mind as much with this shade because I enjoyed the warm tone of the gloss when combined with Bit of Honey.

I had to layer these glosses on thick for there to be any sense of color. Which if you’re not looking for strong pigmentation, then these could be for you. But I found the colors to be a disappointment. The shine on these glosses is good though, and I’d ideally recommend the Full Potential glosses to be used over a lipstick you’re looking to enhance the shine of.

After trying all ten of the Full Potential Lip Glosses my favorite shades were Glamor-Full, Peach Plump, and Ripest Apricot. As a whole, however these glosses are nothing special. I can understand how they didn’t become a long-standing part of Clinique’s line.

I’d give the Clinique Full Potential Lip Glosses 2 beauty bubbles.

Thanks for popping in!

Beating Back Bed Head: 5 Tips for Morning Success

Good morning! Is your hair looking a little out of sorts this morning? Mine too.

I was approached by Casper mattresses–a luxury line of sleep comfort–to share some tips and tricks about how to conquer bed head. Because the nice people at Casper understand that no matter how soft and luxurious the mattress, frizz and tangles still happen.

So here are my tips and tricks to embrace or conquer that pesky beast known as bed head.

1. Braids

Honestly one to the simplest tips I can give you is to braid your hair before bed. It will keep the hair away from your face and will significantly decrease the presence of tangles and frizz in the morning. Then when you wake up you’ll have an easy fix in the morning: you can either wear and go if you’re running late or undo the braid and have a slightly wavy do.

A duo of braids from my college days.

A duo of braids from my college days.

When my hair was longer, I used to do one simple braid down the back. Now that my hair is medium length, I try to do a ton of small braids for a very textured look in the morning. I don’t do this every night but it’s still a lot of fun.

2. Detangling Spray

This was a hard product for me to find originally. When I was perusing the shelves at my local pharmacy, there were a ton of pricey detanglers for women with the fancy names that beauty products favor. But I was looking for budget friendly. So I raided the kids section!

Image respectfully borrowed from Walmart.com


I bought the Equate version of Johnson & Johnson’s Detangler, which was around $1.95 compared to some fancy Paul Mitchell spray that retailed for around $12. I’d particularly recommend this kind of spray if you have fine hair like me. You’ll still smell nice and your hair will thank you for it.

3. Invest in Silk

Image respectfully borrowed from Amazon.com

Silk sheets will diminish any frizz and tangling problems in a snap. I say diminish because sometimes hair is just determined to do what it wants. Cotton pillowcases absorb oil, allergens, and also provide resistance as you move around at night, causing hair to tangle and frizz. Silk pillowcases are not as absorbent and allow your hair to slide rather than stick. In theory the silk pillowcase would also imbibe your hair with added shine. If you’re not looking for a full silk sheet set a.k.a a slip n’ slide, try just pillowcases.

4. Try a Texturizing Spray

Image respectfully borrowed from allure.com

The thing that always confounds me about bed head is that there always seems to be so much more volume to my fine hair that gets it to puff up and stick out at wrong angles. Granted, it’s the wrong kind of volume, but I can’t seem to get my hair to give me the right kind of volume on a regular basis. Enter, texturizing spray. Harness the existing volume of bed head with a little spritz of this stuff. You can tame your bed head a bit while getting all the positives and none of the negatives. This Oribe spray retails for about $36 but there are cheaper alternatives at the drugstore.

5. Embrace Your Inner Prince/Princess

Image respectfully borrowed from beautyreform.com

Have you ever heard a fairy tale where the beautiful princess brushes her flowing locks before bed and counts to 100? I’m not saying you have to go that far in the numbers game, but brushing your hair out for more than a few quick seconds can help stave off some of the worst bed head. I use a paddle brush, which I got years ago from Sally’s. These kinds of brushes stimulate the scalp to reduce dandruff and encourage skin cell turnover, help to distribute oil down the shaft of your hair follicles, and will remove any existing tangles before bed with minimal fuss. You know what they say about the best offense being a good defense! Wait, now I’ve mixed some metaphors here…oh well.

I realize I’m not reinventing the wheel with these tips, but they’ve kept me from hacking at my hair over the years. Fun fact: I did hack a tangled knot from my hair when I was nine. It resulted in a rather drastic haircut, the memory of which has scarred me into believing strongly in the aforementioned tips to avoid tangles.

Thanks again to Casper for prompting this post. I’m not sponsored or getting a kickback for this but if you’d like to check them out, you can click the link here.

Thanks for popping in!

Rosy Fall Nail

Nail art has always fascinated and intimidated me. Over the past few months I’ve dipped my toes (and fingers) into the proverbial nail art water, but I had not tried anything too complicated. Until now.

My fall rose nail!

My fall rose nail!

Actually this look was not hard or overly complicated. It just has all the benefits of looking hard and overly complicated.

I was inspired by YouTuber cutepolish to give roses a shot, but I chose colors that were more inspired by the warm tones of autumn.

First, I put two coats of the cream colored polish over each nail and let it dry.

Then I cracked open my Sally Hansen I Heart Nail Art Tool Kit ($5.99) for the first time since purchasing it months ago. I could not be happier with this little kit!

IMG_2690

The kit also comes with stencils, which I have yet to try but should be fun to play with.

The kit also comes with stencils, which I have yet to try but should be fun to play with.

I took the larger end of the dotting tool and made the base of my roses with the mauve shade. For most of my nails, three dots fit beautifully. But a few nails had two or four, so whatever you think looks good!

Then, using the detail brush, I added the pink over the mauve. Typically three brush strokes would do: two along the edges and a soft spiral for the center.

To finish the rose design I took the smaller end of the dotting tool and added two pale green leaves to every rose by lightly spreading the color around.

After one use I am such a fan of the Sally Hansen set! I cleaned the dotting tool and the detail brush with nail polish remover and a paper towel. That being said, you could definitely accomplish this look with a bobby pin and a toothpick or a pencil if you don’t want to spend money on this little set.

These roses were super simple but looked very chic. I couldn’t stop staring at my nails: so proud!

Polishes Used:

Base and Top Coat–Sally Hansen’s Double Duty

Background–OPI’s You’re So Vain-illa

Rose Base— elf’s Moo Mauve

Rose Detail–elf’s Bubble Gum Pink

Leaves–Julep’s Francis

Thanks for popping in!

September Ipsy Bag 2014

It’s ipsy time again! This month’s theme is Street Style in honor of the glamorous and edgy looks created by fashion week and ipsters everywhere.

IMG_2641

I like the square design and faux silver leather look with its little rivets. It’s a great piece for fall and winter. I could see myself using this as a clutch for an evening out. One of my favorite physical bags in several months.

Infinity Shadow/Crease Duet Brush by Crown Brushes (full size $6.99)

Synthetic fibers, so yay for cruelty-free brushes! Double ended brushes have always mystified me a bit because of the difficulty in storage. This one is much the same. Soft bristles and blends well though.  30 % off any purchase of $25 or more with code CROWNIPSY30.

NYX Hot Singles Eye Shadow in Velvet (full size $4.50)

One of my all time favorite drugstore brands. I will always be happy to see NYX in my ipsy bag. The warm brown shade I received is the ideal crease shade and blends beautifully. Perfect for fall and I think it brings out my blue eyes well too. The coupon for this one was for 30% off their waterproof shadow primer: FALLPROOF.

Don’t Despair, Repair! Deep Conditioning Mask from Briogeo (sample value $4.95)

I wasn’t very excited about this when I saw this in my bag, but the results have changed my mind. First of all, the smell is so light but creates a nice scent cloud. The top note is the sweet almond, which I love. But there’s also some great, nourishing ingredients in this mask like avocado, argon oil, aloe, and essential vitamins. Oh, and its cruelty and gluten-free.

It’s been three days since I last used this and my hair still feels soft and clean. A full size tub of this (5.25 oz) will set you back $26.00, but you don’t need much of it to get the full effects so it would be a good value. I’m considering purchasing but I also have a few other hair products that need to get used up first. So maybe in the future. Just a free shipping code with this one, I probably would have purchased if the code had been better.

Cailyn Art Touch Tinted Lip Gloss in Basic Instinct (full size $19.00)

I wanted to love this product. The name alone made me want to love this gloss. And I’d had luck with Cailyn lippies in past ipsy bags. But at best I find this lip gloss wearable. I won’t be reaching for it regularly. In the tube it looks like a pinky nude but on my lips it reads more like terra-cotta. I do like the applicator which is an oblong sponge instead of a traditional doe foot. This gloss has a very chemical smell to it which is off putting. And the wear-time is poor, maybe 40 minutes max. I’m not giving up on the brand but I’m disappointed with this Cailyn product.

Pacifica 7 Free Nail Polish in Red Red Wine (full size $9.00)

My favorite product this month. Holy cow! I put this on my nails a few days ago and can’t stop staring at them. There has been some chipping but I’m so in love with this color that I’m not even mad at needing to do touch ups. Gorgeous Merlot colored polish that was already quite glossy without a top-coat. I would love to check out more of the Pacifica polishes in the future. Really impressed. For 20% off of any Pacifica purchase use the code FallBeauty at checkout.

Even though I wasn’t happy with the Cailyn lip gloss, this ended up being one of my favorite ipsy bags in months. There were some quality products in here and four out of the five items were full-sized. This month’s $10 bag had a value of $44.44. Very nice!

Here’s my referral link if you’d like to try ipsy.

99 Cent Store Haul

It has been a while since I’ve frequented a dollar store. Not because of some uppity disdain, but more out of poor proximity. Now a 99 Cent Store is just a brief walk away. It’s down the dreaded Maltman that I keep mentioning, but, hey, I’ll have great legs in no time living here!

Last Saturday when Marissa and I went to the farmer’s market, we also went to the 99 Cent Store. I can get into a fair bit of trouble at 99 Cent Stores because you can suddenly justify any and all purchases with, “it’s only a $1!” This is also why I don’t allow myself to go often, because it would get ridiculous rather quickly.

But the fun part of 99 Cent Stores is never knowing what will be there since their stock rotates based on brand availability and willingness to provide overstock.

There is a small beauty and personal care aisle, which is where the bulk of the items here came from.  I also bought a bag of Betty Crocker shortbread mix, a Coca-Cola glass, and an air freshener that smells like red velvet cake. See? Too easy to get into trouble!

As mentioned, everything below retails for $1.

Just looking at these dollar deals make me smile.

Just looking at these dollar deals make me smile.

Skinnygirl Face Solutions:

This is one of those products that I picked up because it was there and it was $1. I’m familiar with the Skinnygirl brand but didn’t realize it extended into makeup or skin care. The box says that the key ingredient is beet root extract, but that’s actually the last thing listed in the ingredients, which means there isn’t much beet root extract in this product compared to the first thing listed–water. I’m rather dubious about this product but for $1, I’ll give it a go.

Via Natural Ultra Care Vitamin E Oil:

I’ve realized that I love the way Vitamin E smells. That was enticement enough for me to add this multi-purpose oil to my bag. Supposedly regular use of this will grant longer, stronger hair. I’m in the process of growing out my hair, so let’s hope that’s accurate. But it’s also good for your skin. I’ll likely use it on my tattoos: taking care of your skin keeps the ink looking fresh.

e.l.f. Bronzer Brush:

This one isn’t as much of a steal as e.l.f. brushes are already priced in the $1-3 range. But I was excited to see any kind of e.l.f. product and the size of this brush would be great for contouring, particularly around my nose.

Sally Hansen nail polish in Pat on the Black:

Stunning mulberry wine shade. I haven’t put this one on my nails yet, but it is such a beautiful fall color. Definitely worth the $1.

My dollar store must haves.

My dollar store must haves.

Nature’s Own Paper Plates:

I consider these a beauty must have. I cut each plate into six pie-shaped pieces and store them with my foundation. When it comes time to use my liquid foundations, I pore a dime sized amount onto the plate and use my beauty blender or brushes to apply the product. I know you can use the back of your hand for this, but I’m guilty of forgetting that I’ve put makeup on the back of my hand after application and end up with patchy hands all day. I also use the plate pieces to put various nail polish colors on as a palette for nail art. Clean up is so much easier this way.

Nu-pore Nose and Face Cleansing Strips:

By far my favorite 99 Cent Store purchase. These are actually repurchases for me. I tried them on a whim, since Biore pore strips never really worked for me and these nu-pore strips are comparable to Biore. The nu-pore strips work 100% better for me than the Biore strips. No idea why, but I’m ever so glad that these are $1. At their cheapest, Biore strips are $6 and I can get the same amount of strips (6) for $2. I use these about once a week as needed.

So that’s my 99 Cent Store haul. All of these lovely products came out to $7, but I believe my total bill was $12.50 adding in the other non-beauty items and tax.

What goodies to you love from your local dollar store?

5 Tips for Buying High-End Beauty on a Budget

Whether your new to makeup products or are a seasoned pro, you’re probably hyper aware of the different price tags for high-end products vs drugstore steals. Myself, I like to mostly buy drugstore and then make a few select high-end purchases when my budget has a bit more leeway.

With that in mind, I’d like to share my five tips for shopping high-end beauty on a budget. I can’t claim I’m reinventing the wheel here, but it’s easy to forget that these methods exist when you’ve got your eye on the pricey item that you just want NOW. Patience, grasshopper.

Next time you’re looking for a high-end steal, why don’t you try…

1. Shopping eBay or discount stores like T.J. Maxx (T.K. Maxx in the UK).

Recently, I was at a Ulta and picked up a Juicy Couture rollerball on a whim, just to see what it smelled like. I fell in love with the scent but wasn’t in the mood to pay $22 when I don’t wear perfume all that often. But I couldn’t stop thinking about that scent once I left the store. So I poked around on eBay and found a seller of the same scent, brand new, for $14, which included the price of shipping. Not a huge discount, but it helped me feel better about my purchase.

IMG_2477

Another example, was a semi-recent purchase of a Bath and Body Works kit at T.J. Maxx. I got full sizes of their Vitamin E day cream, night cream, toner, and cleanser in a kit for $19.00 when it was regularly priced at $30. Again, not dirt cheap but I’m set on skin care for a while. With these kinds of retailers, you have to be up for browsing often in order to find what you want but the deals will make your wallet a bit happier.

2. Wait to purchase that special item until the season’s change.

Seasonal shifts often mean special sales at retailers like Sephora. These sales can be hit or miss because there is no guarantee that the product you’ve been longing for will be in the sale, but it’s worthwhile to skim the clearance section specifically during season transitions. Right now is the perfect time to purchase that summer item you were going back and forth about. Yes, we’re ready to transition to fall, but good products will readily carry you through the seasons.

3. Go in on a high-end product with a friend. 

My best example of this is with Bare Mineral’s mineral eye shadows. My Mom and I went in to their store and naturally fell in love with some of their shades. We both agreed on a handful of shades and decided to split them. Places like The Container Store sell travel size organizers that are similar to the shape and size of a Bare Mineral’s containers for around $1.99. We then put little labels around the container so we’d know the shade name as a reference. For me, even splitting a mineral eye shadow,  it will take me a good long while to finish those shades off. It was a bit of a messy process to split the eye shadows but we both saved some money and got the shade we wanted.

Clear 7-Section Stacking Pill Organizer

Image respectfully borrowed from The Container Store.

Sometimes brands will sell two packs of their products too, so if you and a friend wanted to split the cost of a two pack you’d save each other a bit of money. Make beauty products a bonding experience and share the love!

4.  Hold out for coupons or sales.

This is absolutely a no brainer but bears repeating. Shore up your inner strength and hold out for those coupons at Ulta, Sephora, wherever you most often like to feed your makeup urges. Often their coupons do not apply to prestige products, but every once in a while you hit a coupon that will give you a boost and it is absolutely satisfying.

Also, if you subscribe to services like ipsy or Birchbox, these subscription box companies regularly give monthly discount codes for featured products or have ways for you to spend points on high-end products. Hoard those points like a pro and bask in the save later.

5. Utilize services like Hautelook or Groupon Goods.

I got onto Hautelook specifically for the beauty deals. They’re not always dirt cheap but I just got a Lorac lip gloss for $4.00. I can live with that price tag even if the gloss is last season or two seasons ago. The daily flash sales on Hautelook are not always recognizable brands but they regularly work in brands like Stila, Tarte, and Lorac. If you’d like to sign up for Hautelook here is my invite link (costs nothing to join).

Probably my favorite palette of all time. No joke.

Probably my favorite palette of all time. No joke.

Groupon goods is a tad more random and often you’re buying in bulk. But it’s a site worth skimming from time to time.

I’ve utilized these tips within the last six months or so to get some great high-end beauty deals, so I hope they work for you. What are some of your favorite tricks for saving money on your favorite beauty products?